Saturday 30 December 2017

Favorites 2017

Every year, I publish a “Most Popular” post, showing which posts and recipes were the most viewed from the year. The problem is, year after year, the list doesn’t change all that much. One or two new recipes may break into the list each year, but it’s not that exciting to see a list that barely changes.

This year, I decided to do more of a highlights list from the year. Each month, I looked at the posts published and chose my favorite recipe and favorite post and then the one post that was the most popular that was published that month.

2017 was a fun year–let’s look back at what you may have missed!

January

Favorite Recipe

Lemon Coconut Energy Balls

Lemon Coconut Energy Balls

Favorite Post

chopped competition at home

Chopped Competition at Home

Most Popular 

The Best Healthy and Clean-Eating Super Bowl Recipes

February

Favorite Recipe

Hot Fudge Pudding Cake Vegan and Gluten Free

Hot Fudge Pudding Cake

Most Popular 

Homemade Taco Seasoning Recipe

Homemade Taco Seasoning

March

Favorite Recipe

The ULTIMATE Chopped Kale Chicken Salad

The Ultimate Chopped Kale Chicken Salad 

Favorite Post

10 Reasons I loved my 30s

10 Reasons Why I Loved my 30s

Most Popular 

3 Healthy Homemade Gummy Bear Recipes to Try

April

Favorite Recipe

Spring Vegetable Skillet with Soft Boiled Eggs

Spring Vegetable Skillet with Soft Boiled Eggs

Favorite Post

family in the ocean club med cancun yucatan

Spring Break 2017 

Most Popular 

Creamy Instant Pot Pressure Cooker Lentils

How to Make the BEST Creamy Lentils in the Instant Pot

May

Favorite Recipe

recipe for Baked Eggs with spinach in a sweet potato boat

Baked Eggs and Spinach Sweet Potato Boats

Favorite Post

Mom looking frustrating and exhausted--how to not lose yourself in motherhood

How to Not Lose Yourself in Motherhood

Most Popular

High Protein Low Carb Popsicles Recipe

High Protein Low Carb Popsicles

June

Favorite Recipe

one bowl of Cauliflower Soup with Coconut, Turmeric, and Lime recipe

Cauliflower Soup with Coconut, Turmeric, and Lime

Favorite Post

Parenting During the Easy Years

Parenting During the Easy Years

Most Popular

My Mom is a 10 Year Stage 4 Lung Cancer Survivor

My Mom is a 10 Year Stage IV Lung Cancer Survivor!

July

Favorite Recipe

Overhead shot of Summer Vegetable Orzo

Summer Vegetable Orzo

Favorite Post

Northern Michigan Vacation

Most Popular

Summer Fruit Salad Recipe with Spoon

Summer Fruit Salad

August

Favorite Recipe

Pumpkin spice Steel Cut Oatmeal recipe adding milk

Pumpkin Spice Steel Cut Oatmeal

Favorite Post

A Happy and Healthy Mama

If Mama Ain’t Healthy, Ain’t Nobody Happy

Most Popular

Low Carb Cinnamon Flaxseed Breakfast Cookies

Low Carb Cinnamon Flaxseed Breakfast Cookies

September

Favorite Recipe

Close up shot of Buffalo Cauliflower Poppers (healthy football food recipe idea)

Buffalo Cauliflower Poppers

Favorite Post

Meghan 9 years old

Why I Think I’m Going to Like Having a 9 Year Old

Most Popular

Two stacked Fourless Chocolate Peanut Butter Blender Muffins Recipe

Flourless Chocolate Peanut Butter Blender Muffins

October

Favorite Recipe

Butternut Squash and Black Bean Enchilada Recipe in pan with cilantro on top

25-Minute Butternut Squash and Black Bean Enchiladas

Favorite Post

20 Dinner Time Questions to Get Kids Talking #parenting #tips

20 Dinnertime Questions to Get Your Kids Talking

Most Popular

Creepy Halloween Punch for Halloween Party for kids NO added sugar or artificial dyes

Creepy Halloween Punch

November

Favorite Recipe

Perfect Bread Machine Dinner rolls on the table

Perfect Bread Machine Dinner Rolls

Favorite Post

Beautycounter Flawless in Five set with face showing make up on

Natural Products I’m Loving Now

Most Popular

Healthy Instant Pot Recipes -grid of 16 photos showing the recipes

Healthy Instant Pot Recipes: The Ultimate Collection

December

Favorite Recipe

Overnight Cranberry Cinnamon Rolls recipe the whole pan with cream cheese frosting

Overnight Cranberry Cinnamon Rolls

Favorite Post

Dingle the original elf on the shelf

Meet Dingle, the Original Elf on the Shelf

Most Popular

Strawberry Banana Santa Hats- close up picture easy healthy recipe

Strawberry Banana Santa Hats

There you have it! The highlights from 2017 on Happy Healthy Mama! I can’t wait to see what 2018 will bring. Thank you, thank you, thank you, for coming along on this journey with me. Without you, there would be no Happy Healthy Mama.

XO Maryea

The post Favorites 2017 appeared first on Happy Healthy Mama.


source https://happyhealthymama.com/favorites-2017.html

Friday 29 December 2017

4 Surprising Benefits of (Healthy) Meal Planning

4 Surprising Benefits of Meal PLanning #mealprep #healthy #mealplanningI’ve been writing about healthy living on Happy Healthy Mama for almost eight years. There’s one topic I’ve written about the importance of again and again: Meal Planning. It’s the timeless “trick” that keeps me and my family on track, consistently, year after year.

Only, it’s not a trick. It takes work and commitment to meal plan, but there’s no secret. You just have to take the time to do it. (Please please keep reading after I list the benefits of meal planning if you need help with this. Even if you’ve failed miserably in the past, you CAN do this, and I can help!)

When you do take the time to make meal planning a priority, you’ll find some surprising benefits. Yes, you’ll likely eating healthier more consistently if you make meal planning a habit. But what else can happen? Good stuff!

4 Surprising Benefits of (Healthy) Meal Planning

#1: You’ll save money. 

This is a natural and happy side effect of meal planning. There are less spontaneous take-out dinners. There is less wasted food that goes bad before you use it. There’s less of the more-expensive convenience foods that you buy because you need something quick since you didn’t have a plan for dinner.

#2: You’ll lose weight.

My husband lost forty pounds in the last year. A big part of that was having a plan and sticking to it. If you want to lose weight, planning what healthy foods you’ll eat is key to staying on track and eating the right foods to make it happen. Meal planning becomes your accountability partner and it’s crazy how just having a plan in hand helps you avoid the foods that hurt your weight loss goals.

#3: You’ll get sick less often.

When you’re planning healthy meals, you’re less likely to eat excess sugar and junk food that suppresses your immune system. What happens next? You’re an overall healthier person who gets sick less often!

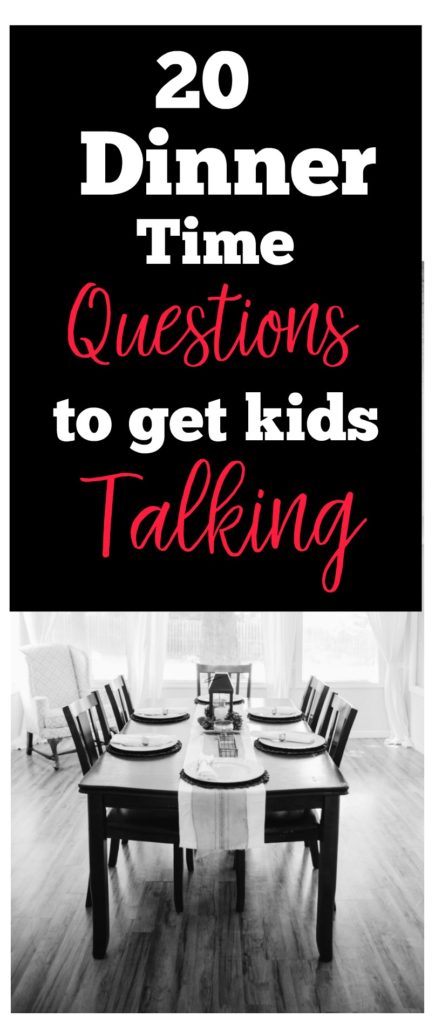
#4: Your family life will be less stressful and chaotic.

When you meal plan, it creates a more harmonious family life. Dinner time becomes less of a stressful, chaotic time trying to figure out what to eat and more of a time for family to come together and share a meal. It can change your life.

If you’re convinced that meal planning is just the change you and your family could use, but aren’t sure how to do it, or have tried meal planning but failed in the past, or just haven’t been able to stay consistent with it, I have the solution you need.Healthy Meal Planning Bundle

It’s the Ultimate Healthy Meal Planning Bundle and it’s the busy cook’s answer to eating healthier this year.

Let me tell you what’s in this amazing bundle. It’s everything you need to make meal planning, grocery shopping, cooking, and eating fresh (healthy!!) food easier than ever.

This is how it works:

If you want recipes & meal plans created specifically for the way you eat (Paleo, Keto, vegan, gluten free, budget-friendly, just to name a few), you can pick the mini-bundle that suits you best and pay just $27.

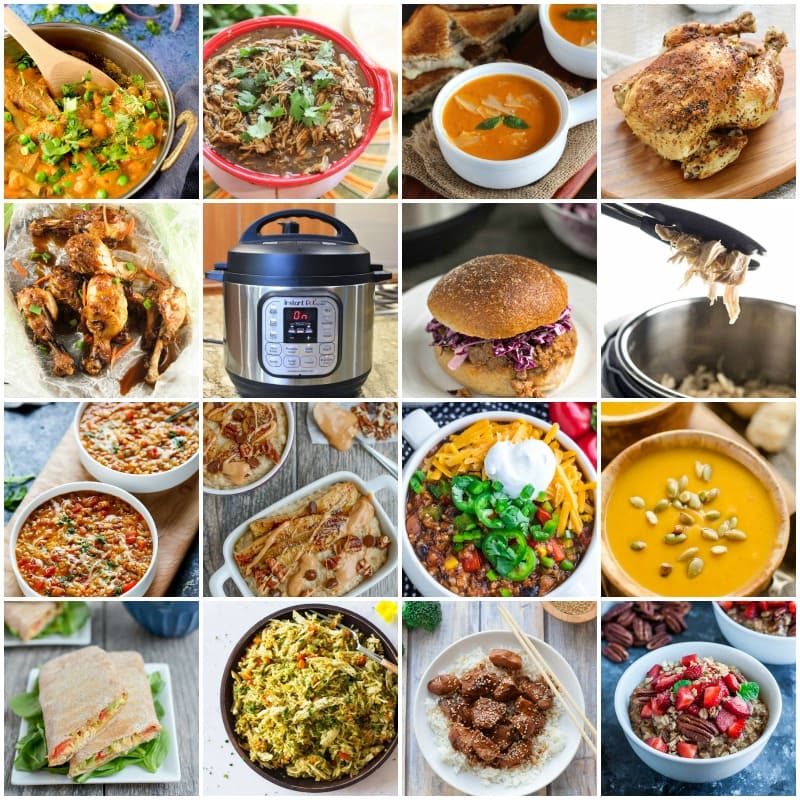
If your family is like my family and try to eat a wide variety of foods and you’d prefer to have the whole collection of made-for-you meal plans, organized shopping lists, no-brainer tips, PLUS over 3,800 recipes for today’s most popular ways of cooking and eating, pay just $20 more and you’ll get every single thing in this bundle.

I’m telling you, this makes meal planning so much easier! For me, the worst part of meal planning is the searching. You look for recipes on Pinterest, only to click through and find that it’s a meal that uses condensed soup or corn flakes. Ugh. Keep searching.

No more! With the Ultimate Meal Planning Bundle, everything is in one place. Over 3,800 recipes, neatly organized by category, that are all healthy, real food recipes! So. Much. Easier.

Some of my favorite food bloggers contributed, so I really can’t speak highly enough about the quality and value of what’s inside, for less than the price of a single meal out! Oh, and did I mention my very own e-Book, Conquer Dinner, is included in the bundle?

Trust me, this is one investment that will pay for itself multiple times over.

Want to check it out and get your own Ultimate Healthy Meal Planning Bundle?

This is how it works:

  • Visit the website take a quick look at all the yummy food you’ll be making with this package, then click the “Get my bundle now!”button to go through their simple and secure 3-step checkout process.
  • You’ll receive an email with a login to their online access portal, where you’ll begin downloading all your eCookbooks and printable meal plans.
  • Use their Getting Started Guide to choose your first meals or find the ready-made plan that’s perfect for you!

The most important detail, though, is that this bundle is available for just 8 days!

After Friday night, January 5th, the sale ends and you’d have to buy all of these products individually.

It’s even backed by a 30 day full money-back happiness guarantee, so you can make sure it’s right for you.

Their customer service is amazing, and they truly want to make sure you’re taken care of and that you love your bundle.

Simplify mealtimes & eat better in 2018 with the Ultimate Healthy Meal Planning Bundle.

Learn more or get your bundle here

But hurry, this bundle is only available for a limited time!

Healthy Meal Planning


The post 4 Surprising Benefits of (Healthy) Meal Planning appeared first on Happy Healthy Mama.


source https://happyhealthymama.com/4-surprising-benefits-of-healthy-meal-planning.html

Wednesday 27 December 2017

Lemony Broccoli Salad

This Lemony Broccoli Salad is the perfect way to detox and restart after you’ve indulged a little too much!

Lemony Broccoli Salad recipe whole bowl with spoon

Heads up! I originally published the recipe for this Lemony Broccoli Salad in January 2013. Photographs have been updated. 

It’s okay if you feel like you need to hit the restart button after the holidays.  I know I do. A few too many heavy foods, too much sugar, not enough activity.  This salad is helping me with that.  Starting over.  I’m all about fresh starts.

I’m calling it a Restart Salad.  Really, it’s a Lemony Broccoli Salad and it’s full of nutrient-dense foods that will help your body detox.  Raw broccoli, seeds, raw garlic, lemon, olive oil, turmeric. These are all foods that will help promote the flushing out of toxins our bodies so desperately need this time of year.

So you all know my husband Tim isn’t the biggest vegetable guy.  He’s come a long way since we got married, but it’s been work getting him to eat more vegetables.  Mostly, for him to enjoy them they have to be roasted or cooked in a stir-fry.  You won’t find him munching on raw veggies very often.  At a party, he’s not the guy you’ll see at the vegetable tray.Lemony Broccoli Salad recipe close up picture in a white bowl
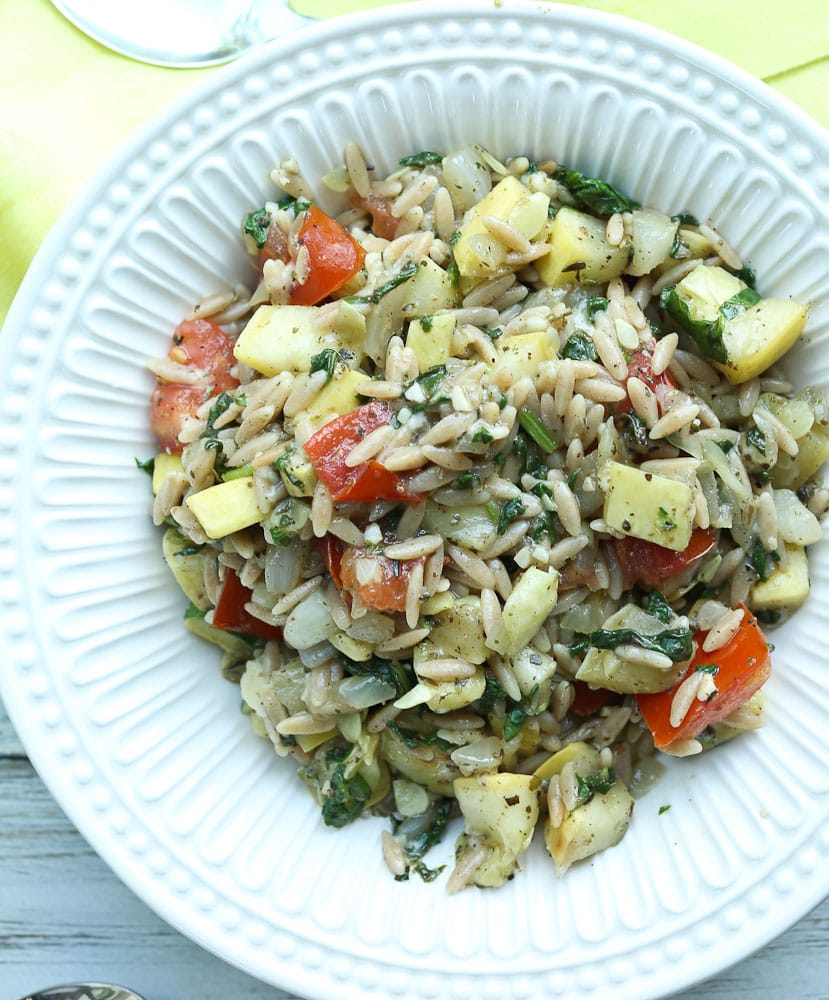
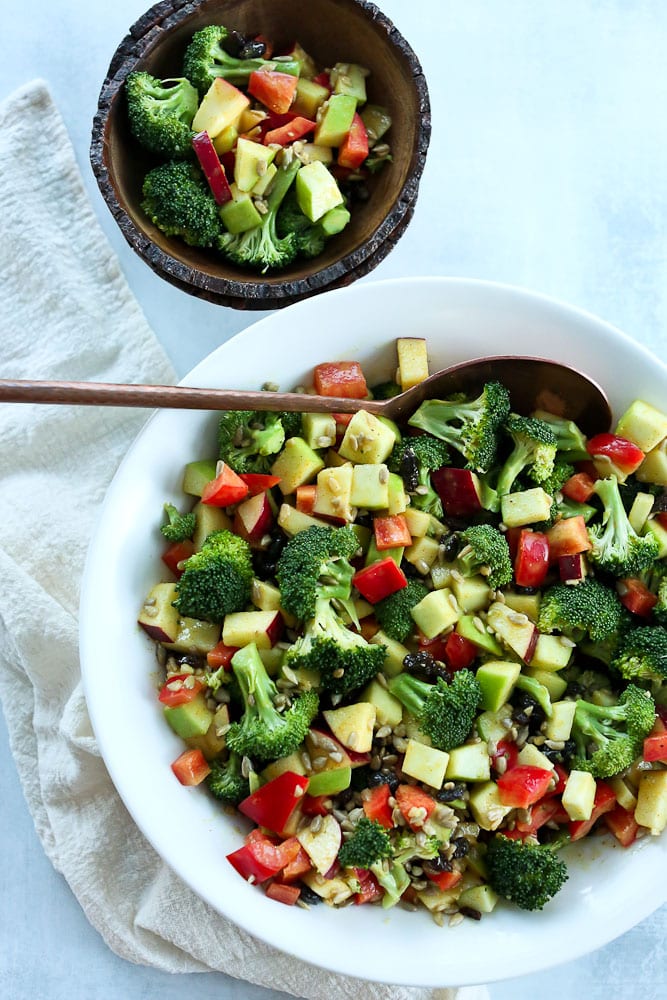
I had to work some magic to get him to try this salad.  I pleaded with him and he finally agreed to try one bite.  He ended up finishing the bowl.  As he was eating it, he looked at me accusingly and said, “The only reason this tastes good is because of the dressing.  Vegetables are not good plain.”

I don’t care if it took a tangy lemon dressing for him to eat this salad, because I’ve never seen him eat raw broccoli before.  In my book, that’s a win.

Print

Lemony Broccoli Salad

Lemony Broccoli Salad recipe close up picture in a white bowl

A perfect salad for kicking off the New Year right, this Lemony Broccoli Salad (AKA Restart Salad) is full of nutrient-dense foods that will help detox your body.  Make it vegan by using maple syrup instead of the raw honey.

  • Author:
  • Prep Time: 15 minutes
  • Cook Time: 0 minutes
  • Total Time: 15 minutes
  • Yield: 4 servings

Ingredients

For the Salad

  • 2 cups chopped broccoli florets (from one small head)
  • 1 small red bell pepper, diced
  • 1 apple, diced
  • 1 avocado, diced (optional)
  • 1/4 cup sunflower or pumpkin seeds
  • 1/4 cup raisins (optional)

For the Dressing

  • 1/2 teaspoon minced garlic
  • 1/2 teaspoon turmeric
  • 2 tablespoons extra-virgin olive oil
  • 1 tablespoon apple cider vinegar
  • 2 tablespoons vegan mayo or good-quality real mayo (I used Earth Balance Mindful Mayo with olive oil)
  • 2-3 tablespoons raw honey
  • juice and zest from one small lemon

Instructions

  1. Combine all dressing ingredients in a small bowl and whisk together well.
  2. In a medium bowl, combine all salad ingredients.  Drizzle the dressing on top and stir to combine.  Enjoy!

Notes

*The recipe was doubled for the photographs in this post.

Nutrition

  • Serving Size: 1/4 of salad


You’ll notice I called the avocado and raisins optional.  Tim said he prefers the salad without those contrasting textures, but I really like them.  It’s up to you if you include them or not.  Have a great week!

If you make this Lemony Broccoli Salad Recipe, or any Happy Healthy Mama recipe, I would LOVE to see it! Please take a pic and share it on Instagram or the Happy Healthy Mama Facebook page and tag me @happyhealthymama ðŸ™‚

Also, if you try it, would you mind rating the recipe? It’s VERY helpful for me and other readers if the recipes have ratings and reviews. I appreciate you!

If you’d like to save this recipe for later, here’s an image to save to your Pinterest recipe board!Lemony Broccoli Salad Recipe. This is a great #detox #salad to #restart after the holidays! #glutenfree #vegan #healthy


The post Lemony Broccoli Salad appeared first on Happy Healthy Mama.


source https://happyhealthymama.com/restart-salad.html

Monday 25 December 2017

Merry Christmas!

From my family to yours, I wish you a very Merry Christmas!Merry Christmas 2017

It means so much to me that you follow and read Happy Healthy Mama.

Thank you! xo Maryea and Family

The post Merry Christmas! appeared first on Happy Healthy Mama.


source https://happyhealthymama.com/merry-christmas.html

Saturday 23 December 2017

Overnight Cranberry Cinnamon Rolls

These Overnight Cranberry Cinnamon Rolls make the BEST Christmas morning breakfast! Overnight Cranberry Cinnamon Rolls-the whole pan looking gooey and delicious recipe

Is there anything better in life than a fresh, homemade cinnamon roll? I’m going to say, no, there is not. And I’m going to try really hard to not post ALL THE PICTURES today, but fair warning: I might go overboard a little. Overnight Cranberry Cinnamon Rolls-close up of the whole pan with a few taken out

I gave traditional cinnamon rolls a holiday twist by adding cranberry sauce. The recipe will totally work if you don’t want to add it, but I thought it was the perfect way to make these extra-Christmasy AND I loved the way the tart cranberries balanced out the sweet cinnamon mixture. SO GOOD. Overnight Cranberry Cinnamon Rolls-one on a plate close up

Overnight Cranberry Cinnamon Rolls-showing the cranberry sauce inside

I love that the bulk of the work for these cinnamon rolls is done the night before. Then, they can bake while you are opening your presents and sipping on coffee. 

These Overnight Cranberry Cinnamon Rolls are a once-a-year indulgence that I wouldn’t classify as “healthy,” but you all know I am all about balance. Sometimes, I eat kale salads, sometimes I eat energy balls, and I don’t feel bad when I face plant into a warm and gooey cinnamon roll. I hope you take the same approach to balanced eating.

Overnight Cranberry Cinnamon Rolls-on a plate with the pan in the background

That being said, I did use half unbleached all-purpose flour and half whole wheat pastry flour as well as coconut sugar instead of refined sugar. These are still a sugar bomb. Sorry. If you want to make them less so, I suggest using a natural, sugar-free sweetener such as one of these.

Overnight Cranberry Cinnamon Rolls-half of the pan with a Christmas napkin

I don’t think you’re going to regret having this pan of delicious Overnight Cranberry Cinnamon Rolls on Christmas morning or whatever morning you choose to indulge. Please let me know what you think!

Print

Overnight Cranberry Cinnamon Rolls

Overnight Cranberry Cinnamon Rolls-the whole pan looking gooey and delicious recipe

These Overnight Cranberry Cinnamon Rolls let you do the bulk of the work the night before and make a delicious Christmas morning breakfast!

  • Author:
  • Prep Time: 45 minutes (active)
  • Cook Time: 30 minutes
  • Total Time: 1 hour 15 minutes
  • Yield: 12 rolls

Ingredients

Dough

  • 4 large egg yolks, room temperature
  • 1 whole egg, room temperature
  • 1/4 cup granulated sugar
  • 6 tablespoons unsalted butter, melted
  • 6 ounces buttermilk, room temperature
  • 2 cups all-purpose flour
  • 1 1/4-2 cups whole wheat pastry flour
  • 2 1/4 teaspoons (1 packet-1/4 ounce)
  • 1 1/4 teaspoon kosher salt
  • avocado oil

Filling

  • 1/3 cup cranberry sauce
  • 1 cup coconut sugar
  • 1 tablespoon ground cinnamon
  • pinch of salt
  • 1 1/2 tablespoons unsalted butter, melted

Icing

  • 1/4 cup cream cheese
  • 3 tablespoons milk
  • 1 1/2 cup powdered sugar

Instructions

For the dough:

  1. In the bowl of a stand mixer with the whisk attachment, whisk the egg yolks, whole egg, sugar, butter, and buttermilk. Add the all-purpose flour, yeast, and salt. Whisk until moistened and combined.
  2. Remove the whisk attachment and replace with a dough hook. Add 1 1/4 cups whole wheat pastry flour and knead on low speed for 5 minutes. Check the consistency of the dough, add more flour if necessary; the dough should feel soft and moist but not sticky. Continue to knead on low speed 5 minutes more or until the dough clears the sides of the bowl.
  3. Transfer the dough to a lightly floured work surface; knead by hand about 30 seconds. Lightly oil a large bowl. Transfer the dough to the bowl, lightly oil the top of the dough, cover and let double in volume, 2 to 2 1/2 hours.
  4. Combine the coconut sugar, cinnamon, salt, and melted butter in a medium bowl. Mix until well incorporated. Set aside.
  5. Butter a 9 by 13-inch glass baking dish.
  6. Turn the dough out onto a lightly floured work surface. Gently shape the dough into a rectangle with the long side nearest you. Roll into an 18 by 12-inch rectangle.
  7.  Spread the dough with the cranberry sauce, leaving 1/2-inch border along the top edge. Sprinkle the cinnamon sugar mixture over the dough, leaving a 3/4-inch border along the top edge; gently press the filling into the dough.
  8. Beginning with the long edge nearest you, roll the dough into a tight cylinder. Firmly pinch the seam to seal and roll the cylinder seam side down. Very gently squeeze the cylinder to create even thickness. Using a serrated knife, slice the cylinder into 1 1/2-inch rolls. You will have 12 rolls.
  9. Arrange rolls cut side down in the baking dish; cover tightly with plastic wrap (that does not touch the rolls) or plastic wrap alternative and store in the refrigerator overnight or up to 16 hours.
  10. Remove the rolls from the refrigerator and place, uncovered, in a cold oven that is turned off. Fill a shallow pan 2/3-full of boiling water and set on the rack below the rolls. Close the oven door and let the rolls rise until they look slightly puffy; approximately 30 minutes. Remove the rolls and the shallow pan of water from the oven.
  11. Preheat the oven to 350 degrees F.
  12. When the oven is heated, place the rolls on the middle rack and bake until golden brown, or until the internal temperature reaches 190 degrees F on an instant-read thermometer, approximately 30 minutes.
  13. While the rolls are cooling slightly, make the icing by whisking the cream cheese in the bowl of a stand mixer until creamy. Add the milk and whisk until combined. Sift in the powdered sugar, and whisk until smooth.
  14. Spread over the rolls and serve immediately. ENJOY!!

Nutrition

  • Serving Size: 1 roll

This recipe was adapted from here.

If you make this Overnight Cranberry Cinnamon Roll Recipe, or any Happy Healthy Mama recipe, I would LOVE to see it! Please take a pic and share it on Instagram or the Happy Healthy Mama Facebook page and tag me @happyhealthymama ðŸ™‚

Also, if you try it, would you mind rating the recipe? It’s VERY helpful for me and other readers if the recipes have ratings and reviews. I appreciate you!

If you’d like to save this recipe for later, here’s an image to save to your Pinterest recipe board!

Overnight Cranberry Cinnamon Rolls Recipe. Perfect for #Christmas #breakfast #brunch

If you are already making cranberry sauce, you might as well use some for this Puff Pastry Christmas Wreath appetizer as well!Puff Pastry Wreath Appetizer on a tray

Want a less labor intensive breakfast for Christmas morning that you can still prepare the night before? This Crock-Pot Cranberry Eggnog Overnight Oatmeal takes about 5 minutes of prep and is PERFECT!

Cranberry Eggnog Oatmeal Crockpot

Please note that links to products are affiliate links. THANK YOU for supporting Happy Healthy Mama!


The post Overnight Cranberry Cinnamon Rolls appeared first on Happy Healthy Mama.


source https://happyhealthymama.com/overnight-cranberry-cinnamon-rolls.html

Friday 22 December 2017

Sweet and Salty Chex Mix Recipe (Dairy-Free and Gluten-Free)

This Sweet and Salty Chex Mix Recipe is a must-make for your next party!Sweet and Salty Chex Mix Recipe scooping out of a big bowl

Growing up, Chex Mix was a staple at every holiday gathering. Is that a midwest thing, or is Chex Mix popular everywhere?

Little confession: I never really loved traditional Chex Mix that much.

Then, one time, I tried a different version of Chex Mix. Someone decided to mix things up (no pun intended…ha!) and served a sweet and salty version of Chex Mix. Clearly, I’ve always had a sweet tooth because that was something I could get behind. It was love at first bite. (I just can’t stop with the puns…) Sweet and Salty Chex Mix Recipe-large serving bowl with smaller bowls

That’s what I’m bringing you today. This Sweet and Salty Chex Mix recipe is for all my friends with a big sweet tooth who need a little sweet to balance out the salty. You definitely get both here and it’s pretty amazing.

Warning: this stuff is addicting. It’s definitely hard to stop eating. That also means it’s going to be a big hit at whatever party you bring it to or serve it at.

Sweet and Salty Chex Mix-close up picture of all the ingredients
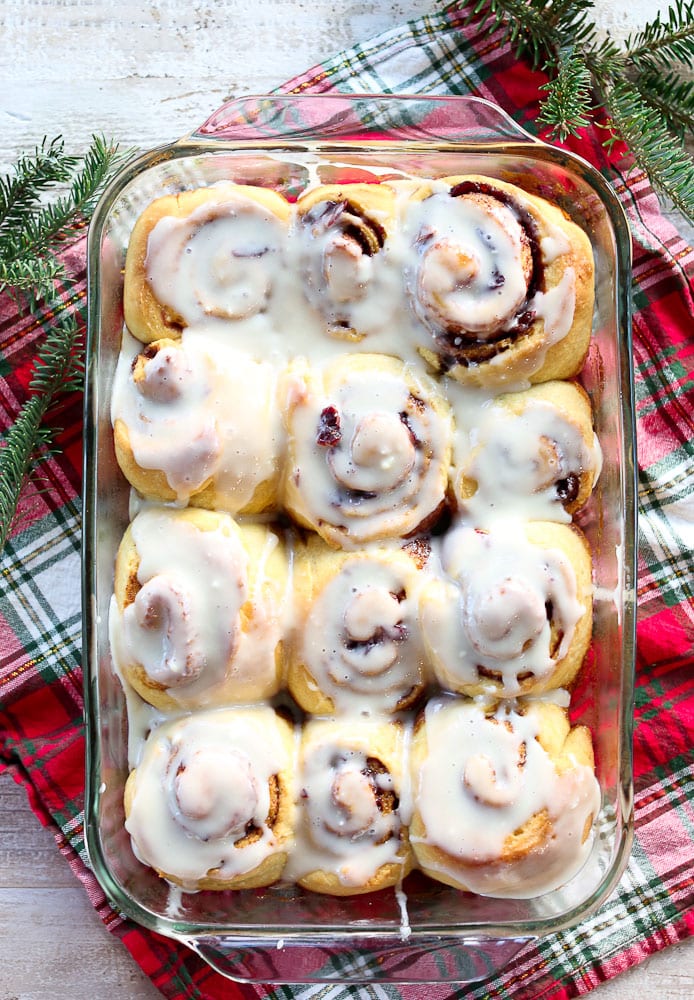
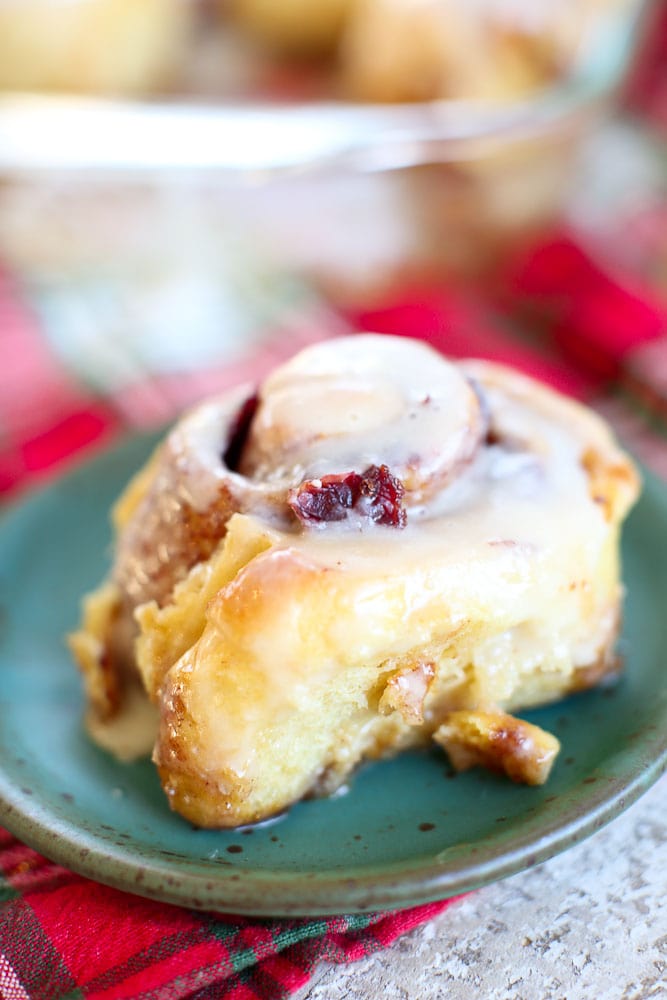
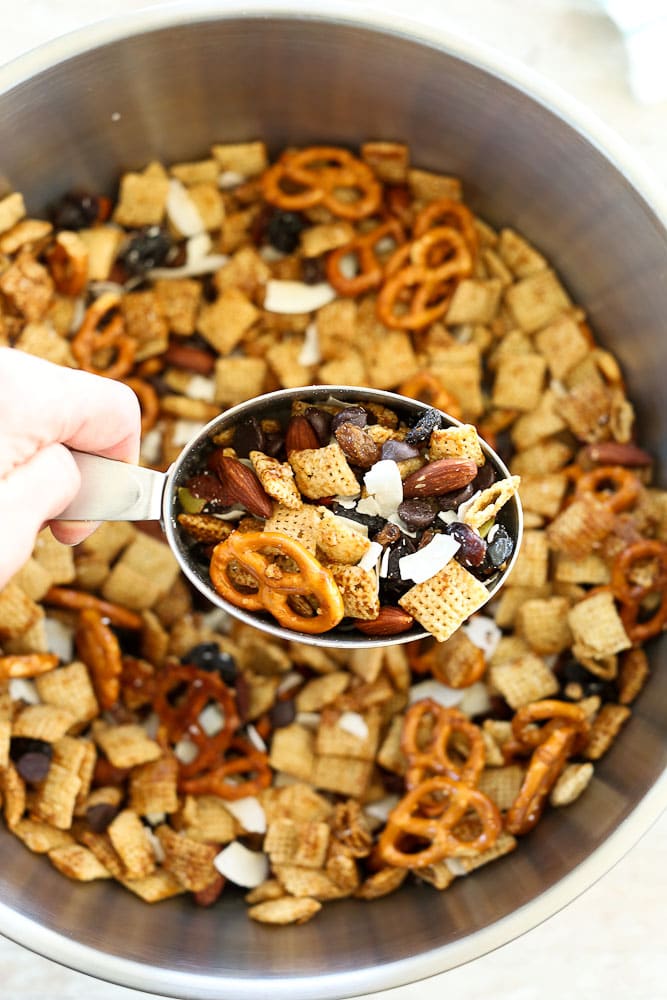
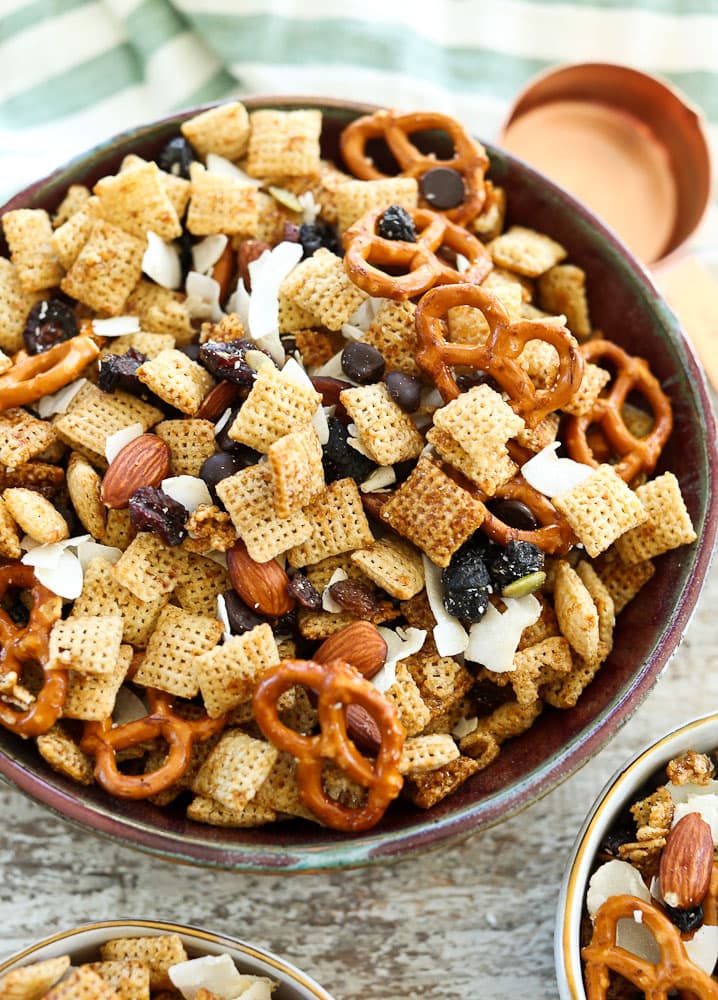
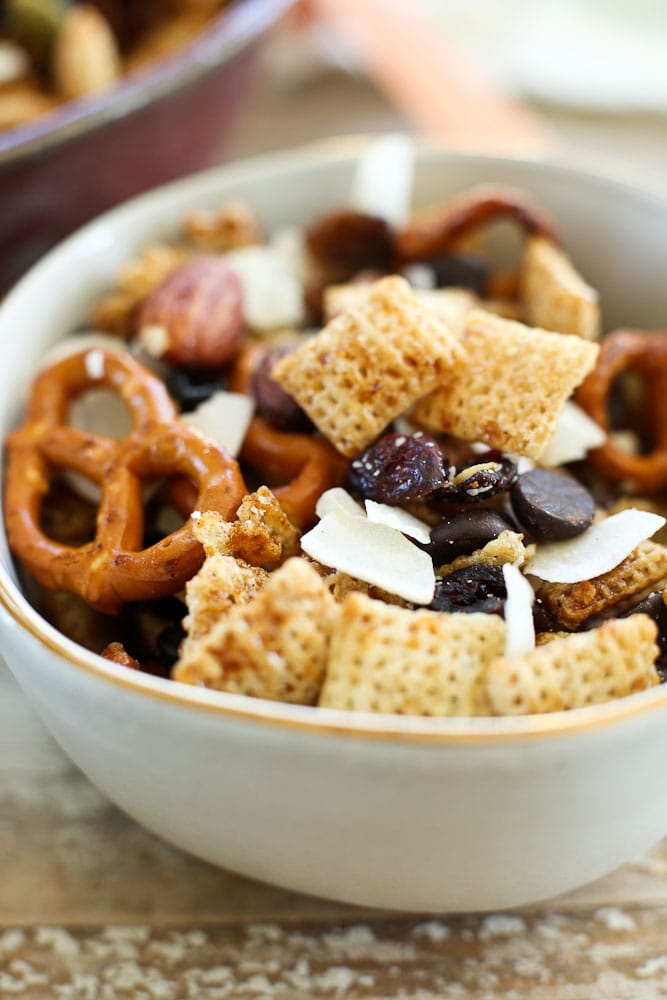
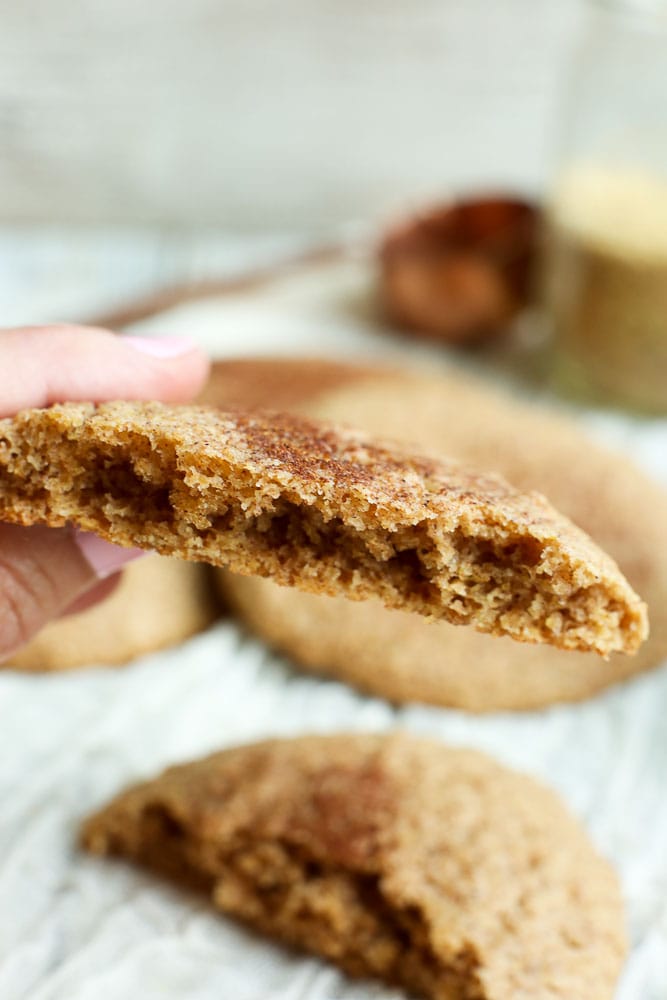
This recipe makes enough to serve an army so you’ll have plenty for a party or to give as gifts. This makes a lovely neighbor gift!

To make this dairy-free, I used coconut oil instead of butter. I used an organic refined coconut oil so there wouldn’t be a coconut taste on everything, but you’re welcome to use unrefined if you’d like an overall coconut flavor.

I also use no corn syrup or refined sugar. My kids insisted on chocolate chips, so actually those do add some refined sugar. Oops. I used these dark chocolate chips from Enjoy Life  which are dairy-free. I also used gluten-free pretzels and Rice Chex so all the gluten-free peeps could enjoy this recipe.

Sweet and Salty Chex Mix Recipe in a small bowl

I wanted to make this as healthy and nourishing as I could, so I used almonds, coconut chips, dried fruit, and seeds in the mix. For the dried fruit and seeds, I used a this Superberry Superfuel blend I found at Costco that includes dried tart cherries, dried blueberries, dried cranberries, raisins, goji berries, and pepitas. If you don’t have that, just use whatever mix of dried fruit and seeds you prefer.

I know you’re going to love this!! I hope you make it for your upcoming holiday parties!

Print

Sweet and Salty Chex Mix Recipe (Dairy-Free and Gluten-Free)

Sweet and Salty Chex Mix-close up picture of all the ingredients

This Sweet and Salty Chex mix is made with coconut oil and no corn syrup, and nourishing ingredients like dried fruits, nuts, and seeds!

  • Author:
  • Prep Time: 10 minutes
  • Cook Time: 1 hour
  • Total Time: 1 hour 10 minutes
  • Yield: 17 cups

Ingredients

Instructions

  1. Preheat the oven to 250 degrees. Line a baking sheet with parchment paper or a silicone baking mat.
  2. In a large bowl, mix together the Chex cereal, almonds, and pretzels. Place the mixture on the lined baking sheet and set aside.
  3. In a small saucepan, melt your coconut oil. Add the honey, coconut sugar, and cinnamon and stir until the coconut sugar is dissolved. Remove from heat.
  4. Drizzle the honey mixture over the Chex mixture and use your hands to make sure it is evenly coated.
  5. Bake in the 250 degree oven for 1 hour, stirring every 15 minutes.
  6. Allow the Chex mix to cool completely and then transfer it to a large bowl. Add the coconut chips, superberry blend, and dark chocolate chips and mix well. Enjoy!

Notes

*I prefer refined coconut oil for this so there isn’t an overall coconut flavor. Unrefined will work also, but there will be a coconut flavor.

**If you don’t have the specific blend I used, substitute 1 cup of dried fruit of your choice and 1 cup of seeds of your choice.

I’m running out of time to post all the recipes I planned before Christmas…so I’ll be posting another recipe tomorrow. If you’re looking for an epic overnight Cinnamon Roll recipe, make sure you stop by!

If you make this Sweet and Salty Chex Mix Recipe, or any Happy Healthy Mama recipe, I would LOVE to see it! Please take a pic and share it on Instagram or the Happy Healthy Mama Facebook page and tag me @happyhealthymama ðŸ™‚

Also, if you try it, would you mind rating the recipe? It’s VERY helpful for me and other readers if the recipes have ratings and reviews. I appreciate you!

If you’d like to save this recipe for later, here’s an image to save to your Pinterest recipe board!Sweet and Salty Chex Mix Recipe--perfect for your Christmas parties! #glutenfree #dairyfree #snackmix #chexmix

Links to products in this post are affiliate links. Thank you for supporting Happy Healthy Mama!

The post Sweet and Salty Chex Mix Recipe (Dairy-Free and Gluten-Free) appeared first on Happy Healthy Mama.


source https://happyhealthymama.com/sweet-and-salty-chex-mix-recipe-dairy-free-and-gluten-free.html

Wednesday 20 December 2017

Gluten-Free Peanut Butter Blossoms

These Gluten-Free Peanut Butter Blossoms are a classic cookie to make for the holidays!Gluten Free Peanut Butter Blossoms recipe Christmas cookies close up shot

There’s only 5 more days until Christmas. The countdown is ON. I hope the only things you have left to do are make Christmas cookies. That’s all I have left. ——>Yeah, right.

In reality, I sitll have a pretty long to-do list before the big day. But that’s okay. As long as I have a few of these Gluten-Free Peanut Butter Blossoms to nibble on, I’ll be okay.Gluten Free Peanut Butter Blossoms Cookies on a cooling rack

The good news is, these aren’t going to take too much of our time. Unwrapping the kisses is probably the hardest part. 

unwrapped kisses for Gluten-free Peanut Butter Blossoms christmas cookies recipe

These are very similar to classic Peanut Butter Blossoms, but I substituted a gluten-free flour blend. I like this one from Bob’s Red Mill, but I’m sure others will work as well. If you don’t need these to be gluten-free, go ahead and use regular flour. Gluten Free Peanut Butter Blossoms Cookies on a cooling rack side angleBefore I get into more details, I know nobody has time for long explanations or stories this time of year, so let’s just jump straight to the recipe, shall we? ENJOY, friends!

Print

Gluten-Free Peanut Butter Blossoms

Gluten Free Peanut Butter Blossoms recipe Christmas cookies close up shot

Gluten-free Peanut Butter Blossoms–your favorite holiday cookie just got a gluten-free makeover! Just like the classic, only gluten-free.

  • Author:
  • Prep Time: 15 minutes
  • Cook Time: 8-10 minutes
  • Total Time: -25229499.1833 minute
  • Yield: 2 dozen cookies

Ingredients

  • 48 milk chocolate KISSES
  • 1/2 cup shortening*
  • 3/4 cup peanut butter
  • 1/3 cup granulated sugar
  • 1/3 cup coconut sugar (or light brown sugar)
  • 1 egg
  • 2 tablespoons milk
  • 1 teaspoon vanilla extract
  • 1 1/2 cups GF baking flour blend
  • 1 teaspoon baking soda
  • 1/2 teaspoon salt
  • granulated sugar

Instructions

  1. Heat the oven to 375 degrees. Remove wrappers from chocolate.
  2. Beat the shortening and peanut butter in a large bowl until well-blended. Add 1/3 cup granulated sugar and the coconut sugar and beat again until fluffy.
  3. Add the egg, milk, and vanilla; beat well.
  4. Whisk together the flour, baking soda, and salt. Gradually beat the flour mixture into the peanut butter mixture.
  5. Shape the dough into 1-inch balls and roll in the extra granulated sugar. Place on an ungreased cookie sheet. Bake for 8-10 minutes.
  6. Take the cookies from the oven and immediately place an unwrapped chocolate kiss in the center of each cookie. The cookie will crack around the edges. Transfer the cookies to a wire rack to cool completely. Enjoy!

Notes

*I prefer this kind of organic shortening that doesn’t have hydrogenated oils.

Nutrition

  • Serving Size: 1 cookie

If you make this Gluten-free Peanut Butter Blossoms recipe, or any Happy Healthy Mama recipe, I would LOVE to see it! Please take a pic and share it on Instagram or the Happy Healthy Mama Facebook page and tag me @happyhealthymama ðŸ™‚

Also, if you try it, would you mind rating the recipe? It’s VERY helpful for me and other readers if the recipes have ratings and reviews. I appreciate you!

If you’d like to save this recipe for later, here’s an image to save to your Pinterest recipe board!Gluten Free Peanut Butter Blossoms Recipe #Christmascookies #glutenfree


The post Gluten-Free Peanut Butter Blossoms appeared first on Happy Healthy Mama.


source https://happyhealthymama.com/gluten-free-peanut-butter-blossoms.html

Monday 18 December 2017

Luke’s 6th Birthday Party at Chuck E Cheese’s

Today, my baby is six years old. SIX! It must be said: How is this possible?!Luke's 6th Birthday Party at Chuck E Cheese's-blowing out the candles on his cake

Isn’t it funny how, as parents, we live and learn with each child and make adjustments as we go?  With my oldest, I wanted to have handmade birthday invitations and Pinterest-worthy birthday parties with pretty decorations. In the process, I drove myself crazy and never quite achieved what I was hoping for anyway (Evidenced here and here).

Live and learn. Live. and. learn.

Now, my goal is to have a fun birthday party that the kids enjoy and doesn’t create any extra stress for me. This year for Luke’s 6th birthday, we achieved that in a big way at Chuck E Cheese’s.

This birthday party at Chuck E Cheese’s was so much fun for Luke and his friends. They now offer Unlimited Play birthdays, where each child gets a card and can play an unlimited number of games during the birthday party. The kids had an absolute blast playing the games without having to worry about running out of tokens or reloading their cards.

Luke's 6th Birthday Party at Chuck E Cheese's-Luke and a friend playing games

There was plenty of silliness and smiles in between their game playing.

Luke's 6th Birthday Party at Chuck E Cheese's-posing with a friend

What six-year-old boy wouldn’t love pretending to be a firefighter putting out a fire? Luke's 6th Birthday Party at Chuck E Cheese's-playing the fire fighting game

Another great feature of a kids birthday party at Chuck E Cheese’s is the Magic Ticket Blaster. There was a lot of anticipation surrounding the Magic Ticket Blaster. Luke's 6th Birthday Party at Chuck E Cheese's-looking at the Magic Ticket Blaster

Every birthday child gets to step into the Magic Ticket Blaster for a chance to grab the Magic Ticket, which is worth 500 tickets to redeem for a prize. Luke's 6th Birthday Party at Chuck E Cheese's-Luke in the ticket blaster

The wind blowing the tickets all around ended up being a little overwhelming for our sensitive Luke, so he didn’t grab any tickets. Our sweet host saw that Luke was upset and made sure to give Luke some tickets anyway. He was such a huge help throughout the party, and this was above and beyond his duty. It was fantastic.

The fun factor was a no-brainer for the kids, but the best party about having your kid’s birthday party at Chuck E Cheese’s is the ease and lack of stress.

I learned a long time ago that the kids don’t care if I’m up until midnight putting together goodie bags or making decorations; they only care about having fun at their party.

Anything and everything you want covered can be done for you and all you have to do is show up. They had the table decorated with the theme we chose, balloons, and goody bags for every child ready.Luke's 6th Birthday Party at Chuck E Cheese's-goody bags

I was able to reserve the party online and they even offer free customizable email invitation to make every step super easy. Luke's 6th Birthday Party at Chuck E Cheese's-email invitation

Driving home from the party, Luke commented, “That ended up being my best birthday party ever.” What more could I hope for? Besides time slowing down, just a little, so my baby stops growing so fast, I couldn’t hope for more than that.

For more information about having your kids birthday party at Chuck E Cheese’s, find them on Facebook, Instagram, and Twitter.   

This is a sponsored conversation written by me on behalf of Chuck E. Cheese’s. The opinions and text are all mine.


The post Luke’s 6th Birthday Party at Chuck E Cheese’s appeared first on Happy Healthy Mama.


source https://happyhealthymama.com/lukes-6th-birthday-party-chuck-e-cheeses.html

Saturday 16 December 2017

Puff Pastry Christmas Wreath Appetizer

This Puff Pastry Christmas Wreath Appetizer is a delicious way to start your holiday meals!

Puff Pastry Christmas WreathAppetizer with Christmas napkins on a serving plate

How are all of your holiday preparations coming along? Do you have your appetizer list ready to go? I have one more for you to add to your list! This Puff Pastry Christmas Wreath Appetizer is so delicious I almost ate the whole thing all by myself when I was testing the recipe.

I used Dufour’s frozen puff pastry because it has a simple, cleaner ingredient list than most of the puff pastries you’ll find and I think it tastes a lot better, too. It’s not always easy to find, though, so use whatever brand you can find.

This is a really easy recipe and makes a pretty presentation. It’s especially easy if you prep the cranberry sauce (or buy store bought?) and chicken ahead of time. You’ll be able to assemble this quickly and enjoy your time with friends and family. Let me show you how to prepare it!

How to Make a Puff Pastry Christmas Wreath Appetizer

Puff Pastry Wreath Appetizer How To instructions

  1. Thaw your frozen puff pastry ahead of time according to the package directions. Lay the thawed puff pastry on a lightly floured surface and lightly flour both sides of the dough.
  2. Find a large bowl to use as a template and cut around the bowl to create a circle. Save the extra dough for another use. Transfer the dough circle to a baking sheet lined with parchment paper or a silicone baking mat.
  3. Using a smaller bowl, press down to create a inner circle of your wreath. Don’t press all the way through.
  4. Using a sharp knife (I used a crafting xacto knife), cut the inner circle into eight equal triangles, as if you are cutting pizza slices.
  5. Add the cranberry sauce, goat cheese, chicken, and rosemary to the outer circle of the wreath.
  6. Pull up the triangles and press the dough together on the edge of the wreath, as shown. Use your fingers to push up the entire edge of the wreath. Brush melted butter on the top of the dough and sprinkle with coarse sea salt.
  7. Bake at 400 degrees for 20 minutes. If the dough didn’t get brown enough, you may broil it for 1-2 minutes.

In the end, you’ll have a beautiful Puff Pastry Christmas Wreath Appetizer that your guests will love. Puff Pastry Wreath Appetizer on a tray

These flavors go together so well. It’s the perfect combination of sweet cranberry sauce with creamy goat cheese and savory chicken. So good!Puff Pastry Wreath Appetizer recipe serving

Here’s a close up for you of what the ingredients look like together. Puff Pastry Wreath Appetizer recipe close up picture

I hope you and your family LOVE this!

Print

Puff Pastry Christmas Wreath Appetizer

Puff Pastry Wreath Appetizer on a tray

This Puff Pastry Christmas Wreath Appetizer has sweet cranberry sauce, creamy goat cheese, and savory chicken wrapped in buttery puff pastry. It’s an incredible and pretty appetizer!

  • Author:
  • Prep Time: 30 minutes
  • Cook Time: 20 minutes
  • Total Time: 50 minutes
  • Yield: 10 servings

Ingredients

  • 1 box puff pastry dough
  • 1/4 cup cranberry sauce
  • 5 ounces goat cheese, broken into pieces
  • 1 boneless, skinless chicken breast
  • 2 large sprigs rosemary, divided
  • 1 large sprig thyme
  • coarse sea salt
  • 1 tablespoon butter, melted

Instructions

  1. To cook your chicken, place it in a pot with one sprig of rosemary, one sprig of thyme, and sprinkle it with salt and pepper. Fill the pot with enough water to cover the chicken by about two inches. Bring to a boil, reduce the heat to a good simmer, and partially cover the pot. Cook for ten minutes, or until the chicken is cooked to an internal temperature of 165 degrees. Use tongs to remove the chicken, allow it to cool, and then use two forks to shred the chicken. (Tip: This can be done ahead of time)
  2. Chop the leaves from your second rosemary spring finely and preheat the oven to 400 degrees.
  3. Thaw your frozen puff pastry ahead of time according to the package directions. Lay the thawed puff pastry on a lightly floured surface and lightly flour both sides of the dough.
  4. Find a large bowl to use as a template and cut around the bowl to create a circle. Save the extra dough for another use. Transfer the dough circle to a baking sheet lined with parchment paper or a silicone baking mat.
  5. Using a smaller bowl, press down to create a inner circle of your wreath. Don’t press all the way through.
  6. Using a sharp knife (I used a crafting xacto knife), cut the inner circle into eight equal triangles, as if you are cutting pizza slices.
  7. Add the cranberry sauce, goat cheese, chicken, and rosemary to the outer circle of the wreath.
  8. Pull up the triangles and press the dough together on the edge of the wreath, as shown. Use your fingers to push up the entire edge of the wreath. Brush melted butter on the top of the dough and sprinkle with coarse sea salt.
  9. Bake at 400 degrees for 20 minutes. If the dough didn’t get brown enough, you may broil it for 1-2 minutes.

If you make this Puff Pastry Christmas Wreath Appetizer recipe, or any Happy Healthy Mama recipe, I would LOVE to see it! Please take a pic and share it on Instagram or the Happy Healthy Mama Facebook page and tag me @happyhealthymama ðŸ™‚

Also, if you try it, would you mind rating the recipe? It’s VERY helpful for me and other readers if the recipes have ratings and reviews. I appreciate you!

If you’d like to save this recipe for later, here’s an image to save to your Pinterest recipe board!Puff Pastry Wreath Appetizer. #christmasrecipes #appetizers #puffpastry

The post Puff Pastry Christmas Wreath Appetizer appeared first on Happy Healthy Mama.


source https://happyhealthymama.com/puff-pastry-christmas-wreath-appetizer.html