Wednesday 31 May 2017

How to Intentionally Plan Date Nights (Even If You Don’t Leave the House!)

Want to keep your marriage strong? Here’s how to intentionally plan date nights and nurture your relationship!How to Intentionally Plan Date Nights My husband Tim and I have been married a decade. Do you know how easy it gets to slip into a routine where we forget to nurture our relationship?

I’m sure most of you married folk can feel me on this one.

Especially if you’re married with kids.

Life gets hectic. Work, kids’ schedules, volunteering, trying to maintain a healthy lifestyle. All of it squeezes our time until, if we aren’t careful, if we aren’t intentional, our married life gets put on the back burner.

A while back, I wrote this post about why I put my husband before my kids. Now I’m highlighting one way I do that.

Date nights! It sounds so simple, yet it’s powerful.

You’ve got to plan intentional date nights on a consistent basis. This guarantees that you’ll have that time with your spouse. When you take the time to spend a few hours together on the regular, you’re always making deposits into your relationship bank.

This is so important in not losing that solid connection with your spouse.

I was recently with my older brother and he showed me his phone calendar. On Saturday night it said, “Mom & Dad Hot Date.” They have five kids and very busy schedules. He knows he’s got to put aside that time to spend with his wife. He’s so serious about it happening every week, it’s in his calendar. I never would have admitted this as a kid, but my brother is pretty smart.

My biggest piece of advice if you want to have consistent date nights is to put it on your calendar.

We can’t all go out somewhere for a weekly date night, but you can certainly have a weekly date night at home. As often as you can, get out of the house with your spouse and without the kids for a date night. Fill in the gaps with date nights at home.
Watching a movie--how to intentionally plan date nightsFind a common time and put it on your calendar so that it happens. Saying “we should do that” doesn’t often result in something actually happening.

We recently had a date night in the most classic of ways: Movie Night In! Movie Night in with G.H. CretorsHere’s a little confession: I rarely see movies in the theater. I almost always wait until the movies I want to see come out on demand or DVD. It’s the perfect, no-stress way to spend a night with your spouse.

You can make your movie night special and fun. Get cozy and get some food!

What’s a movie night without popcorn?! G.H. Cretors makes the bold claim that they make “Obsessively Delicious Popcorn.” I have to say that they are absolutely spot on with that claim. Movie Night with G.H. Cretors popcornWant to elevate your movie night 1000%? Get this popcorn!

G.H. Cretors doesn’t use anything artificial in their products and their popcorn is non-GMO. They also have an organic line. Oh yeah!

Watching a movie eating G.H. Cretors popcorn

We could not stop munching on this popcorn! Obsessively delicious for sure.

I’m all about keeping it real here on Happy Healthy Mama. It’s easy to see part of the picture and think that’s telling the whole story. But sometimes, there’s more than meets the lens.

If you’re a parent, you know that even the best laid plans can go awry. Sometimes, date nights get interrupted by the little humans in our life. Movie night interrupted by a child. :)

That’s why having regular times set aside is so important! I know they’ll be another date night soon where it’ll be just the two of us. <3

This is a sponsored conversation on behalf of G.H. Cretors. All opinions are my own. Thank you for supporting the brands that allow me to bring you free content. 


The post How to Intentionally Plan Date Nights (Even If You Don’t Leave the House!) appeared first on Happy Healthy Mama.


source http://happyhealthymama.com/how-to-intentionally-plan-date-nights-even-if-you-dont-leave-the-house.html

Tuesday 30 May 2017

Broccoli Bites Recipe

These Broccoli Bites transform regular broccoli–even the broccoli haters like them!
Broccoli Cheese Bites Recipe on a plate with ketchup
This recipe was first published in 2010! Pictures have been updated and I am republishing so more people can see and try this recipe. Enjoy!
If your toddler or even older child is reluctant to eat her veggies, I encourage you to try these delicious broccoli bites.  Even though Meghan will eat plain broccoli, she eats much more when it is in this form.
Broccoli Bites on a sheet pan
I first started making these for her when she was around 10 months old; I would just cut them into small pieces.   The best thing about these yummy broccoli bites is that they are so versatile.  Your whole family will enjoy them and they are great both as a side dish for a meal or snacks. Broccoli Cheese Bites dipped in ketchupIf you have a ketchup lover, these broccoli bites are GREAT dipped in ketchup! They make a perfect, healthy side dish that everyone can be happy about.
I think they’d be fantastic with this Sweet Potato Black Bean Burger or these Stuffed Turkey Burgers instead of fries. Healthy burger and broccoli bites? Yes, please!
Here’s what one reader had to say about these Broccoli Bites:

“DELICIOUS! Thank you so much Maryea! They ATE broccoli! They ate BROCCOLI! I called them Broccoli Cookies, because what kid doesn’t like cookies? They are still too young to understand that broccoli and cookie isn’t exactly a combination that makes one think ‘mmmm yummy’. I even used a cookie scoop to help portion out the “cookies”, and then flattened them with the back of the scooper.

They devoured three each, which for them is a lot. My “I don’t eat broccoli” husband even remarked that they were really delicious (in a surprised tone). Thank you again for getting my kidabunks and hubby to eat broccoli. Maryea, thank you so very much for helping me feed my family healthy and delicious meals.” 

I hope you’re convinced to give these Broccoli Bites a try!

Print

Broccoli Bites Recipe

Broccoli Cheese Bites dipped in ketchup
  • Author:
  • Prep Time: 20 minutes
  • Cook Time: 20 minutes
  • Total Time: 40 minutes
  • Yield: ~25 nuggets

Ingredients

  • 1-10 ounce package frozen broccoli or 2 small crowns, florets chopped
  • 1/2 cup whole grain bread crumbs*
  • 2 large eggs (if your little one is not eating egg whites yet, use 3 yolks)
  • 1 cup shredded mild cheddar cheese
  • 1/4 teaspoon garlic powder
  • 1/2 teaspoon dried oregano
  • 1 teaspoon dried basil

Optional healthy add-ins

  • 1 teaspoon kelp
  • 1 tablespoon ground flax seed meal

Instructions

  1. Preheat oven to 375 degrees.  Coat a baking sheet with oil or spray with non-stick cooking spray and set aside.
  2. If using frozen broccoli, cook broccoli according to package directions and chop into small pieces. If using fresh broccoli, chop and steam until tender.
  3. In a medium bowl, whisk eggs.
  4. Add remaining ingredients to bowl and mix until well incorporated.  (You may have to use your hands)
  5. Shape the mixture into 1 1/2 inch nuggets and place on the baking sheet.
  6. Bake in the preheated oven for 20-25 minutes, flipping the nuggets over half way through the cooking time.
  7.  Serve warm. Enjoy!

Notes

This recipe was originally adapted from here

Nutrition

  • Serving Size: 1 nugget
  • Calories: 35
  • Sugar: 0.3
  • Fat: 2
  • Carbohydrates: 2
  • Fiber: 0.3
  • Protein: 2
If you make this or any other Happy Healthy Mama recipe, I would LOVE to see it! Please snap a photo and share it on my Facebook page or your Instagram and tag me @happyhealthymama 🙂
Would you like to save this recipe for later? Here’s an image to pin to your Pinterest recipe board!
Broccoli cheese bites nuggets recipe | toddler | vegetable | side dish | healthy

The post Broccoli Bites Recipe appeared first on Happy Healthy Mama.


source http://happyhealthymama.com/toddler-tuesday-broccoli-bites.html

Friday 26 May 2017

Homemade Baked Beans from Scratch

You’ll never go back to canned baked beans again after you try these Homemade Baked Beans from Scratch!a Bowl of Homemade Baked Beans from Scratch recipe

Baked beans are a standard fixture at every summer barbecue. Do you ever notice a disconnect between childhood memories of food and the actual food? I remember baked beans being my favorite food at summer barbecues, but it was always canned baked beans. I remember those canned baked beans being the best. thing. ever.

Now? Meh. Not as fabulous as I remember. That’s why I’m bringing you these Homemade Baked Beans from Scratch. So much better.

Today is the first official day of summer at our house because these two cuties are both done with their school year.

I’m half excited to have them home and half in freak out, what-in-the-world-am-I-going-to-do-with-them-all-day mode. Anyone else have mixed feelings about having the kids home all day during summer break?

Since summer break is here for us, I’m diving in to the summer recipes head first.(Although I might just have a soup recipe for you next week…so I take that back. Ha!) We’re starting with a recipe that is a fool proof one you can bring to every picnic, potluck, and barbecue…Homemade Baked Beans from Scratch! Get ready to ditch your canned baked beans forever. Large pot showing Homemade Baked Beans from Scratch dried beans recipe


These are grown-up baked beans and they a have a kick, which I love. I wouldn’t have loved the kick as a kid, but now I think it takes these baked beans to the next level. I used this recipe as my inspiration and ended up loving it almost exactly as written. I switched out the brown sugar and used maple syrup instead, mostly because I prefer to use a less-processed sweetener, but also because I think the maple flavor is perfect in baked beans.

When I use bacon, I look for uncured bacon. This means it’s made without any artificial nitrates. I also purchase bacon with either the organic or certified humane label. I’m not interested in supporting factory farms as the way they treat their pigs can be horrible. So I recommend uncured bacon with a certified humane label.

Homemade Baked Beans from Scratch take a lot more time than opening a can, yes, but they are still easy. The prep and hands-on time is minimal. And there’s a big bonus: your house is going to smell amazing with these beans cooking low and slow all day. Large pot showing Homemade Baked Beans from Scratch dried beans recipe

How to Cook Homemade Baked Beans from Scratch

It’s easier than you think! It just takes a few steps and you’ll have everyone begging for your recipe. Check out these easy steps.

  1. Soak your dried beans. I do this before I got to bed and they are ready in the morning. Easy.
  2. Drain your soaked beans and reserve the soaking liquid.
  3. Soften the bacon, onion, and jalapeño pepper in a large Dutch oven or heavy-bottomed, oven-proof pot. (If you don’t like heat, leave the pepper out. Oh, I love it, though!)
  4. Add the seasonings, liquid, and beans.
  5. Bake in the oven.

You’re going to love the results of using dried beans for your baked beans recipe. Close up shot of homemade baked beans from scratch using dried beans

Happy summer!

Print

Homemade Baked Beans from Scratch

Large pot showing Homemade Baked Beans from Scratch dried beans recipe

These homemade baked beans from scratch start with dried beans and end with baked beans perfection! They are worth the time.

  • Author:
  • Prep Time: 10 minutes
  • Cook Time: 6-8 hours
  • Total Time: 52 minute

Ingredients

  • 1 pound dry Great Northern beans
  • 1 pound bacon, chopped
  • 1 large yellow onion, chopped
  • 2 jalapeños, chopped (omit if you don’t like spicy)
  • 1/4 cup tomato paste
  • 1/4 cup maple syrup
  • 1/4 cup molasses
  • vegetable broth
  • 1/4 teaspoon cayenne pepper (omit if you don’t like spicy)
  • 1 teaspoon black pepper
  • 2 teaspoons kosher salt

Instructions

  1. Soak your beans overnight with just enough cold water to cover the beans.
  2. Drain your beans and reserve the soaking liquid.
  3. Heat a Dutch oven or large, heavy-bottomed pan over medium heat and add the bacon, onion, and jalapeño pepper. Cook about 5 minutes, until the onion and jalapeño are softened.
  4. Add the tomato paste, maple syrup, molasses, and beans.
  5. Measure your soaking liquid and add enough vegetable broth to equal 4 cups of liquid total. Add this to the Dutch oven and bring to a boil over high heat.
  6. Add the cayenne, black pepper, and salt and stir to combine.
  7. Cover and cook in the preheated oven for 6-8 hours, until the beans are cooked.*

Notes

*Mine were perfect after 6 hours. 

Recipe adapted from Alton Brown’s recipe.


If you make this recipe, I would LOVE to see it! Snap a picture and share it on Instagram or Facebook and tag me @happyhealthymama

Would you like to save this recipe for later? Here’s an image to save to your Pinterest recipe board!

homemade baked beans from scratch | recipe | barbecue | summer | dried beans | clean eating | healthy homemade baked beans from scratch | recipe | barbecue | summer | dried beans | clean eating | healthy

Are you looking for more recipes to bring to your summer barbecues or potlucks? Here are some ideas for you!

Broccoli Salad with Yogurt Dressing

Broccoli Salad with yogurt dressing

Pesto Pasta Salad

pesto-pasta-salad

Chickpea Salad

Easy and flavorful Chickpea Salad. This is just like the Tricolor Chickpea salad from Costco. Great easy, healthy recipe!

Cucumber, Green Grape, and Avocado Salad

The post Homemade Baked Beans from Scratch appeared first on Happy Healthy Mama.


source http://happyhealthymama.com/homemade-baked-beans-scratch.html

Wednesday 24 May 2017

Baked Eggs and Spinach in Sweet Potato Boats

These Baked Eggs and Spinach in Sweet Potato Boats make a healthy breakfast that is equally delicious!Recipe for Baked Eggs with Spinach in Sweet Potato Boats.

How’s your breakfast looking these days? Ho hum? Boring? Let’s work on that!

This recipe for baked eggs with spinach in these awesome sweet potato BOATS is going to elevate your breakfast game 100%. That’s how you can sell this to your kids. Who doesn’t want to eat breakfast in a sweet potato BOAT? Pretty cool if you ask me.

recipe for Baked Eggs with spinach in a sweet potato boat

Another thing I love about this recipe is I can make a batch and then have breakfast ready for days. Meal prepping for the win.Runny yolk baked egg with spinach stuffed inside a sweet potato

The yolks get a little more cooked when I reheat, but I still love ’em.

Eggs+spinach+sweet potato is just such a great combination. Yes, it’s super healthy. But really, it’s all about the flavor!! I can’t get enough of this and have been eating it for two weeks straight.

Let me show you how the prep goes down. The only part that takes a while is initially cooking the sweet potato. BUT. You can easily cut that down by using your microwave. No judgement here. 😉 Ours just happens to be broken at the moment and we’re kind of getting used to living without it. So let’s check out this (easy!) process!

How to Make Baked Eggs and Spinach in Sweet Potato Boats

First you need to cook your sweet potatoes. It’ll take about 10 minutes in the microwave, or an hour in the oven. Then you want cut them in half and scoop out the flesh, leaving a small rim of flesh around the edges and a little bit in the bottom. You want to leave room for the spinach and egg to bake inside.

Picture of scooped out sweet potato boats

Next, you add some butter and chopped spinach and pat it down so there’s room for the egg. (Butter is optional. Kind of.)

Step 2 of preparing Baked Eggs with Spinach in sweet potato boats--spinach and butter added

Then you carefully crack one egg inside of each sweet potato half.

Step 3 of preparing Baked Eggs with Spinach in sweet potato boats--raw eggs added

These go into the oven and are ready in about 15 minutes.

4 Baked Eggs with Spinach in a Sweet Potato Boat on a sheet pan

You can bake them longer if you want the yolk cooked through, but I’m all about the runny egg!

Although I’ve been making these for myself nonstop, I think they’d also be perfect for when you have weekend company. What a fun and unique breakfast to serve to your guests! I hope you all love these as much as I have.

Print

Baked Eggs with Spinach in Sweet Potatoes

Recipe for Baked Eggs with Spinach in Sweet Potato Boats.

Bake your eggs right in sweet potato “boats” in this nutrient-packed breakfast!

  • Author:
  • Prep Time: 5 minutes
  • Cook Time: 1 hour, 15 minutes
  • Total Time: 1 hour 20 minutes
  • Yield: 4 servings

Ingredients

  • 2 large sweet potatoes*
  • 1 tablespoon butter
  • 1 cup packed baby spinach, finely chopped
  • 4 eggs
  • salt and pepper

Instructions

  1. Preheat your oven to 400 degrees.
  2. Cook your sweet potatoes. You can bake them in the oven at 400 degrees for 45 minutes-1 hour (my preference) or microwave them for about 10 minutes. (Poke holes first if microwaving. Not necessary if baking.)
  3. Slice the cooked sweet potatoes in half and scoop out most of the flesh, leaving a small rim of flesh around the skin. (see photos) Reserve the flesh for another use.
  4. Season the sweet potatoes with salt and pepper.
  5. Add the small cubes of butter to each half and then top with the chopped spinach. Season with salt and pepper again.
  6. Carefully break one egg into each sweet potato half.
  7. Bake in the preheated oven until the eggs are cooked to your liking, about 15 minutes. (Longer if you want the yolk cooked hard.)
  8. Season one last time with salt and pepper and serve.

Notes

*Make sure you get large sweet potatoes, or the egg won’t fit inside.

Nutrition

  • Serving Size: 1 sweet potato half
  • Calories: 159
  • Sugar: 4
  • Fat: 7
  • Carbohydrates: 17
  • Fiber: 3
  • Protein: 7


If you make these, I definitely want to see! Please snap a picture and post it on Instagram or Facebook and tag me! @happyhealthymama

Would you like to save this recipe for later? Here’s an image to save to your Pinterest recipe board!

baked eggs in sweet potato recipe | healthy breakfast | sweet potato recipes | low carb | vegetarian | gluten-free | Paleo


The post Baked Eggs and Spinach in Sweet Potato Boats appeared first on Happy Healthy Mama.


source http://happyhealthymama.com/baked-eggs-and-spinach-in-sweet-potato-boats.html

Monday 22 May 2017

Energizing Cucumber Mint Smoothie

This Energizing Cucumber Mint Smoothie will become your go-to smoothie recipe this summer!Energizing Cucumber Mint Smoothie Recipe
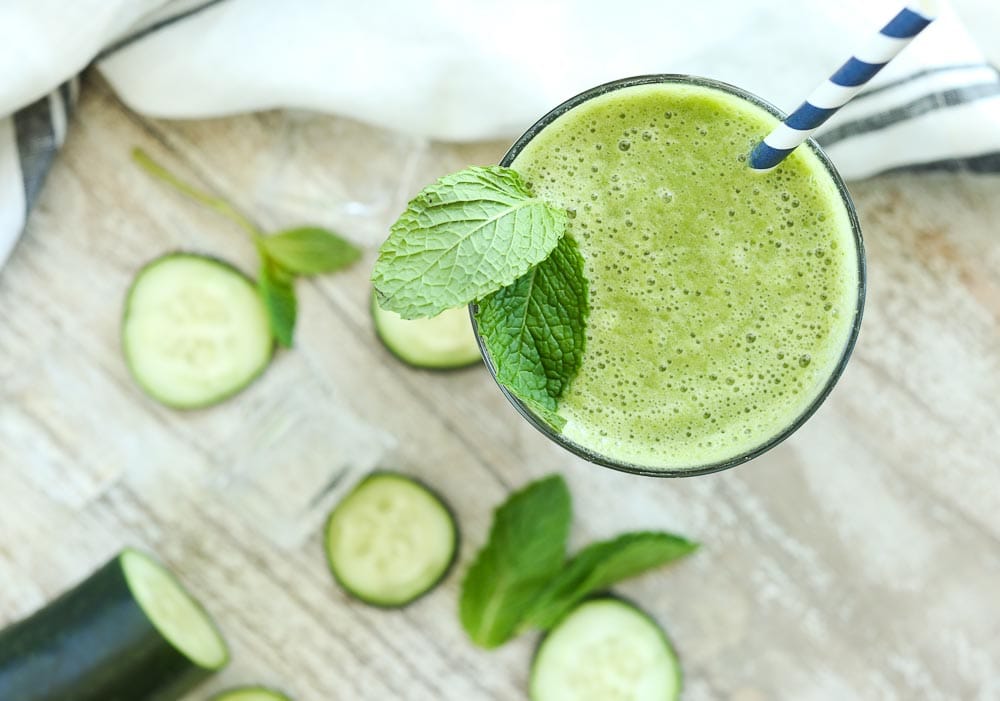
Who’s ready for summer?! This girl. This Cucumber Mint Smoothie will get you ready if you’re not there yet. It’s light, refreshing, and ENERGIZING!

Cucumbers and mint are abundant in the summer so this is a perfect summer smoothie. Who grows their own vegetables? How wonderful would it be to walk outside, grab a cucumber and some mint from your garden, and blend up this smoothie. Ah. #lifegoals blender showing ingredients for Energizing Cucumber Mint Smoothie RecipeCucumbers are full of water, so this is a hydrating smoothie. Mint has a cooling effect as well. This smoothie will keep you cool and refreshed all summer long!

Energizing Cucumber Mint Smoothie with Daily Energy Nutrient booster
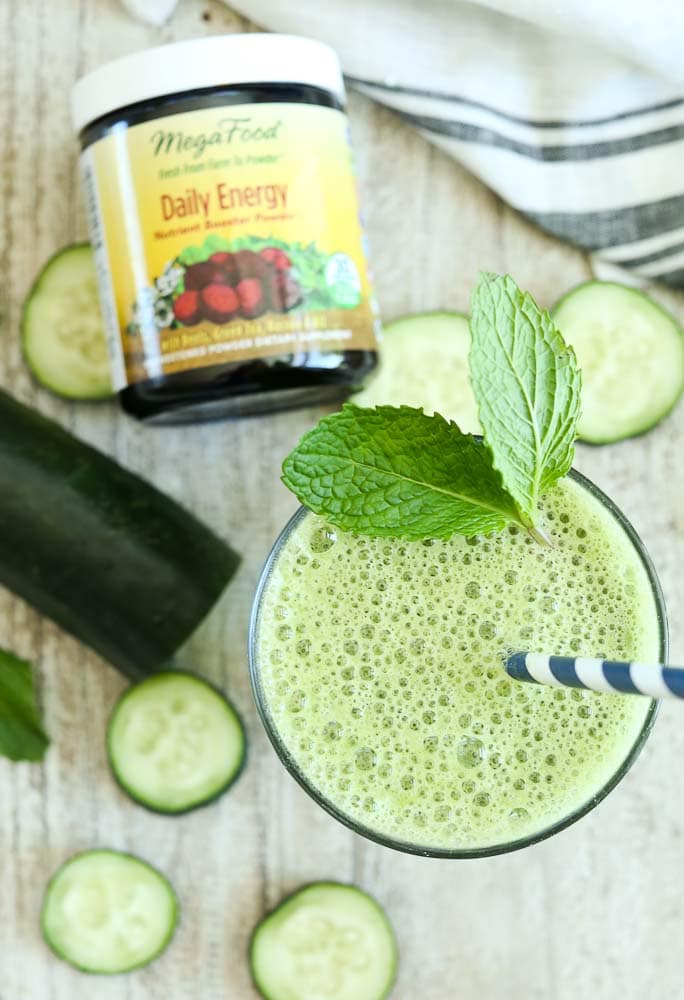
This Energizing Cucumber Mint Smoothie is also made with Daily Energy Nutrient Booster Powder from MegaFood. I’ve been adding their different Nutrient Booster Powders to my smoothies every day, and they are total game changers. Who couldn’t use a nutrient boost daily?

Energizing Cucumber Mint Smoothie Recipe
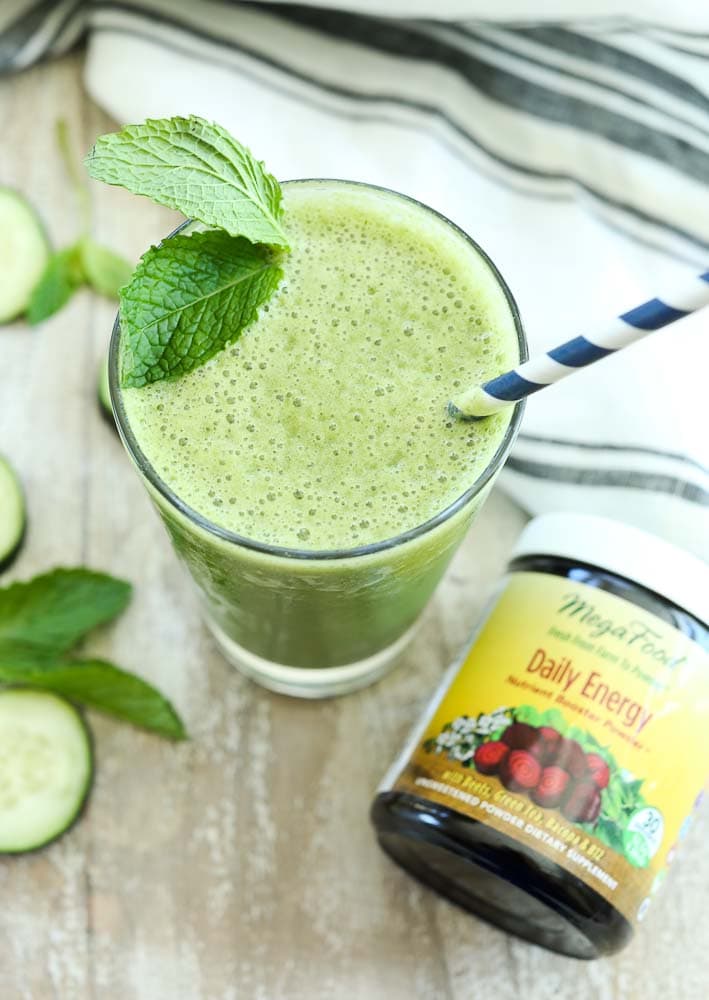
Daily Energy is an uplifting Nutrient Booster Powder that includes FoodState B12 and Farm Fresh Beets. This power-packed duo promotes and sustains energy levels throughout the day without any stimulants.* 

Energy without caffeine?! Game changer, right? No more afternoon coffee that just gives me the shakes instead of  giving me real energy. I’m not saying I don’t love my coffee. I do. But this lovely Nutrient Booster Powder is helping me drink less of it.Energizing Cucumber Mint Smoothie Recipe
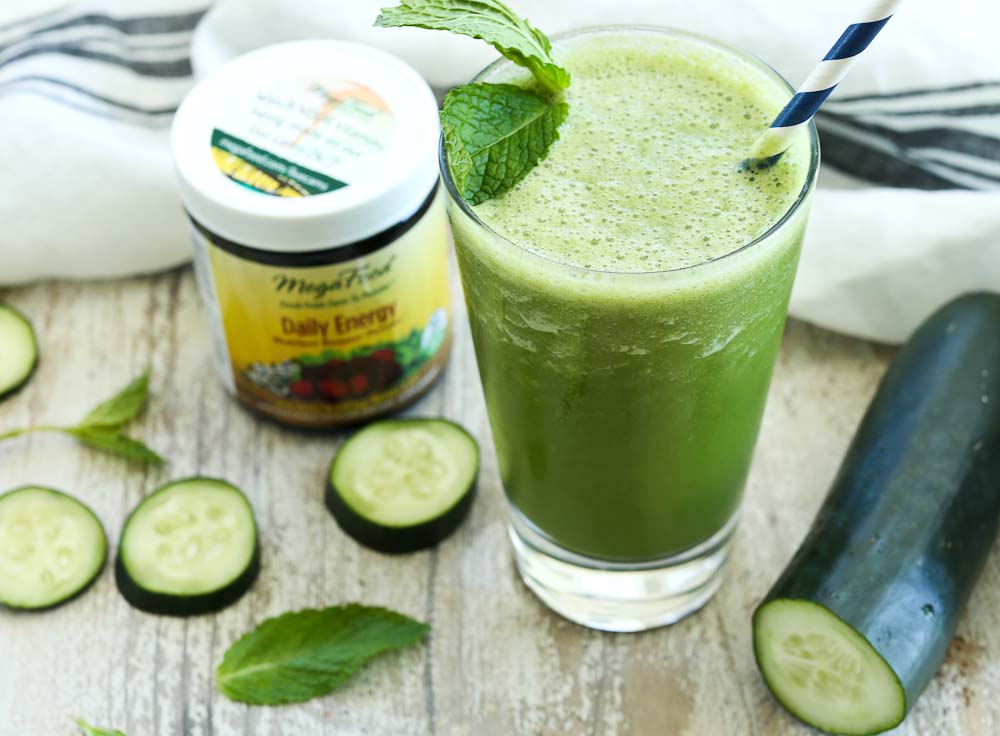
Daily Energy also includes FoodState Chromium and Green Tea, which help enhance mental alertness, focus, and healthy metabolism.* It also contains Eleuthero, Ashwagandha, and Bacopa, herbs revered for their body-strengthening properties.* As a mom with a lot on her plate, I appreciate all of those things!Energizing Cucumber Mint Smoothie recipe

I leave the skin on my cucumber for maximum nutrition, but if you prefer a super smooth smoothie, you can peel it first. Either way, you’re going to love the flavor of this Energizing Cucumber Mint Smoothie! I’ve made it five days in a row now and I’m going back to the grocery store for more mint. I think I’m going to have to plant some this year. 🙂

I also include directions for using a frozen cucumber vs. fresh. The flavor is the same, but the one with frozen cucumber is a bit thicker. I tried it both ways and couldn’t decide which I liked better. You decide!

Print

Energizing Cucumber Mint Smoothie

This Energizing Cucumber Mint Smoothie is made with MegaFood’s Daily Energy Nutrient Booster that promotes and sustains energy levels throughout the day.*

  • Author:

Ingredients

  • 1 cucumber, sliced (fresh or frozen)
  • 1/4 cup-3/4 cup unsweetened vanilla almond milk (1/4 cup if using fresh cucumber, 3/4 cup if using frozen cucumber)
  • 3 large mint leaves
  • 1 scoop MegaFood Daily Energy Nutrient Booster Powder
  • 1/2 teaspoon pure stevia powder
  • 1 cup ice

Instructions

  1. Place all ingredients in the blender and blend until smooth. Enjoy!


* This statement has not been evaluated by the Food and Drug Administration. This product is not intended to diagnose, treat, cure or prevent any disease.


If you make this or any Happy Healthy Mama recipe, I would love to see it! Snap a picture and tag me on Instagram or Facebook @happyhealthymama!

Would you like to save this recipe for later? Here’s an image to save to your Pinterest recipe board!

Refreshing and Energizing Cucumber Mint Smoothie Recipe. healthy smoothie for summer!

This post was created in partnership with MegaFoods. All opinions are my own. 


The post Energizing Cucumber Mint Smoothie appeared first on Happy Healthy Mama.


source http://happyhealthymama.com/energizing-cucumber-mint-smoothie.html

Friday 19 May 2017

Healthy Chocolate No Bake Trail Mix Cookies

These Healthy Chocolate No Bake Trail Mix Cookies are much healthier than traditional Chocolate No Bake Cookies!
A plate of Healthy Chocolate No Bake Trail Mix Cookies recipe

Note: This recipe for Healthy Chocolate No Bake Trail Mix Cookies was originally published in May 2013. I was making a batch and decided to update the photos and republish for newer readers to discover this delicious recipe! The rest of the text is from the original post. Enjoy!

I get cravings for no-bake cookies.  Yes, those no-bake cookies.  The traditional no-bake cookies made with butter and milk and 2 cups of sugar.  Probably my favorite cookie.  I’d take one (or seven) of those over chocolate chip cookies any day.one close up Healthy Chocolate No Bake Trail Mix Cookie Recipe

So I got this recipe idea in my head to try to make a healthier no-bake cookie.  Sometimes I get recipe ideas in my head and they can easily turn into obsessions if I don’t try them.  These cookies are one of those ideas that just wouldn’t go away, but I never seemed to have the time to try them out.  Which is crazy since this recipe is super quick.

The only thing I’m sad about is that I waited so long to finally try to make this healthy version of no-bake cookies.  Because now I’m pretty much obsessed with them.  They are fantastic.  I used shredded coconut in place of some of the oats used in traditional no-bakes, and nuts and seeds replaced the remaining amount.  Coconut and chocolate is totally my jam, but if you don’t love it, you can use oats instead of the shredded coconut.Recipe for Healthy No Bake Trail Mix Cookies

Now I call these healthy because they are nutrient dense.  With coconut oil, almonds, walnuts, sunflower seeds, and pumpkin seeds, they are full of vitamins, minerals, and healthy fats.  But looking at that ingredient list you know they can’t be low calorie.  Keep that in mind and eat these in moderation.  I’ve been failing miserably in that category, so don’t say I didn’t warn you. 🙂

Print

Healthy Chocolate No Bake Trail Mix Cookies

one close up Healthy Chocolate No Bake Trail Mix Cookie Recipe
  • Author:
  • Prep Time: 15 minutes+cooling time
  • Cook Time: 1 minutes
  • Total Time: 17 minute
  • Yield: 36 cookies

Ingredients

  • 1/3 cup Sucanat *(or organic cane sugar)
  • 1/3 cup honey
  • 1/2 cup coconut oil
  • 3 tablespoons unsweetened cocoa powder
  • 1/2 cup unsweetened almond milk
  • 1/8 teaspoon salt
  • 1/2 cup almond butter
  • 1 teaspoon pure vanilla extract
  • 1 cup finely shredded unsweetened coconut
  • 1/2 cup almonds
  • 1/2 cup walnuts
  • 1/2 cup sunflower seeds
  • 1/2 cup pepitas (pumpkin seeds)

Instructions

  1. Have a tray lined with wax paper ready.
  2. In a medium saucepan, bring the Sucanat, honey, coconut oil, cocoa powder, milk, and salt to a rapid boil.  Boil for one minute.
  3. Turn off the heat and add the almond butter, vanilla, shredded coconut, almonds, walnuts, sunflower seeds, and pepitas and stir well.
  4. Drop the mixture by the teaspoonful onto the wax paper.  Allow to cool for about 15 minutes, and then transfer to the refrigerator to set completely, about another 20-30 minutes.
  5. These are best kept stored in the refrigerator and served cold.

Notes

*affiliate link. Thank you for supporting Happy Healthy Mama!

Nutrition

  • Serving Size: 1 cookie
  • Calories: 107
  • Sugar: 4 grams
  • Fat: 9
  • Carbohydrates: 6 grams
  • Fiber: 1.4 grams
  • Protein: 2.2 grams


This recipe is highly adaptable, so have fun with it.  You can use different milks, nut butters, and nut and seed combinations to make it your own.  I think it’d be great with some dried fruit in there, as well.

If you make this or any Happy Healthy Mama recipe, I want to see it! Snap a pic and tag me on Instagram or Facebook @happyhealthymama

Would you like to save this recipe for later? Here’s an image to save to your Pinterest recipe board!

Yes healthy! These Chocolate No Bake Cookies are lower sugar and packed with nutrients. A healthy vegan and gluten free treat.

Do you love healthy cookies? Here’s some more recipes for you to try!

Salted Double Chocolate Peanut Butter Cookies

Black Bean Chocolate Peanut Butter Cookies. These healthy cookies are made with NO flour, NO oil, and NO refined sugar. You don't have to tell anyone they are made with black beans because you can't taste the beans at all! These are just incredible cookies that happen to be healthy.

Grain-Free Peanut Butter Chocolate Chip Cookies

Sugar Free Banana Peanut Butter Cookies

Banana Peanut Butter Cookies 

The post Healthy Chocolate No Bake Trail Mix Cookies appeared first on Happy Healthy Mama.


source http://happyhealthymama.com/chocolate-no-bake-trail-mix-cookies-grain-free-dairy-free.html

Wednesday 17 May 2017

High Protein Low Carb Almond Vanilla Popsicles

These High Protein Low Carb Almond Vanilla Popsicles are made without sugar and make a healthy treat. 
High Protein Low Carb Popsicles Recipe
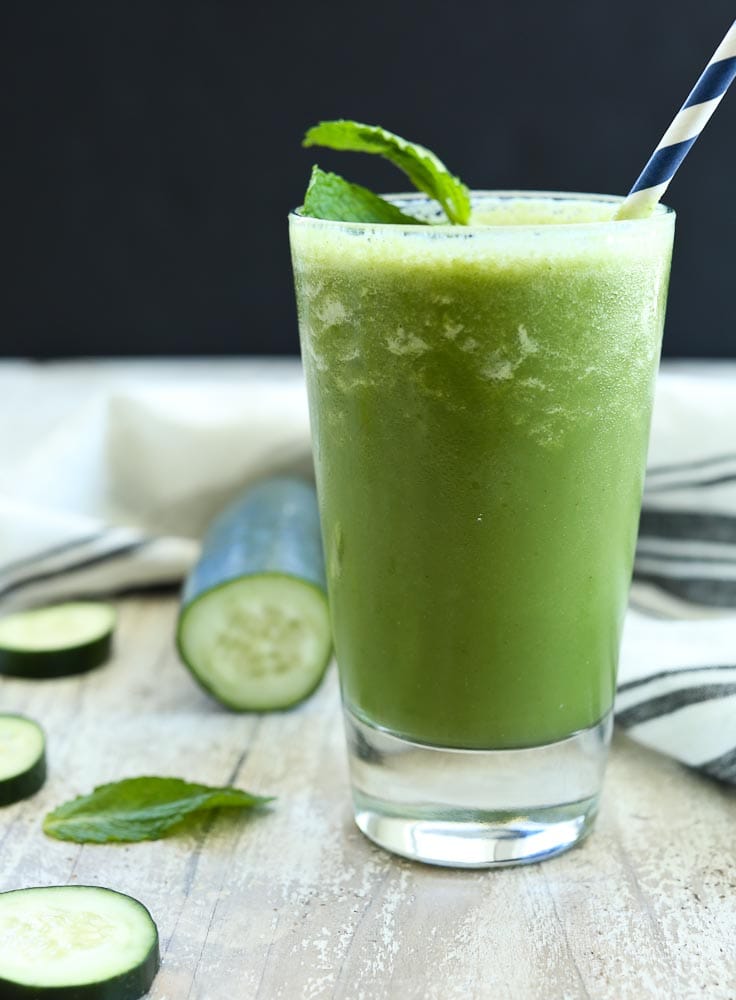
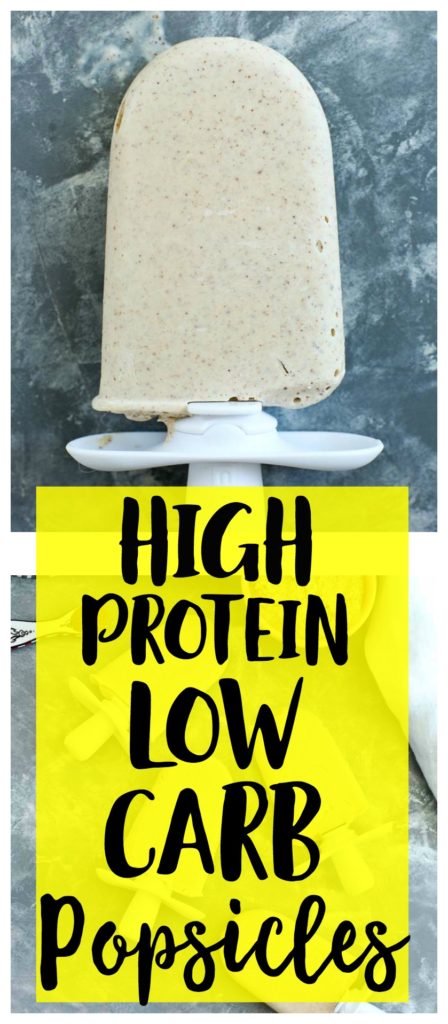
I haven’t thought about protein and carbs as much in my whole life as I have these last few months. My husband, Tim, decided he was going to make some diet changes and started following a lower carb way of eating.

I admit I’ve never been much of a counter when it comes to my food. I don’t count calories or carbs or fat grams or protein. Pasta in any form is pretty much my favorite meal. I’ve always just strived for balance and figure if I eat a big enough variety, I’ll get all the macronutrients I need in the correct amounts. Close up picture of High Protein Low Carb Almond Vanilla Popsicles

At the same time, Tim has found something that works for him (he’s lost 30+ pounds and feels great) and I support my husband. Since I’m the main cook in this family, I’m happy to help him by creating yummy recipes that fit into his diet, like this High Protein Low Carb Almond Vanilla Popsicle.

Whether you follow a low carb diet or not, it’s a good idea to snack on foods that are low in sugar and have a decent amount of protein to keep you full. These popsicles achieve that by using Silk’s Protein Nutmilk, which has 10 grams of protein per serving. High Protein Low Carb Almond Vanilla Popsicles using Silk's Protein Nutmilk
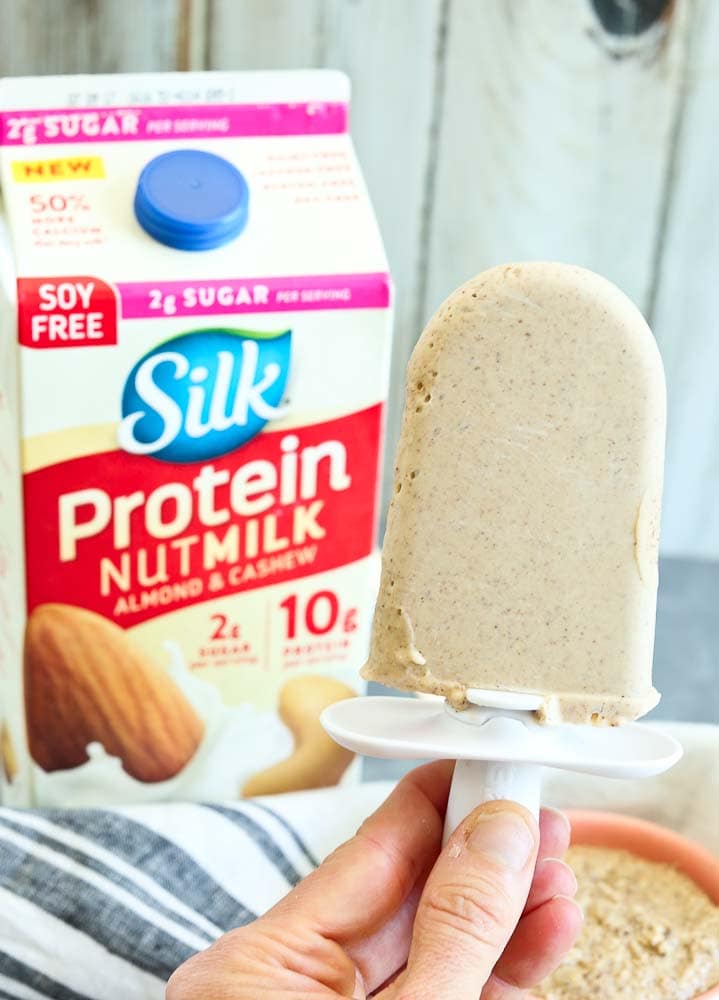
The milk gets its protein from a plant-based pea protein, which I love.

Even though I created this recipe for my husband, my kids were the first taste testers and both of them approved. I’d call that a win! It’s a great way to get some extra protein into your kiddos if they are the type of kids with carb-heavy diets who shun foods with proteins.

These tasty popsicles have just 132 calories each with 6 grams of protein, 1 gram of sugar, and 5 grams carbs.

High Protein Low Carb Almond Vanilla Popsicle Recipe

These High Protein Low Carb Almond Vanilla Popsicles make a perfect snack for hot summer days. I hope you give this one a try!

Print

High Protein Low Carb Almond Vanilla Popsicles

Close up picture of High Protein Low Carb Almond Vanilla Popsicles

These High Protein, Low Carb Almond Vanilla Popsicles make a perfect healthy summer snack!

  • Author:
  • Prep Time: 5 minutes
  • Total Time: 5 minutes
  • Yield: 4 popsicles

Ingredients

  • 1 cup Silk Protein Nut Milk
  • 1/4 cup almond butter
  • 1 teaspoon pure vanilla extract
  • 3/4 teaspoon ground cinnamon
  • 1/2 teaspoon pure stevia
  • pinch of salt (optional)

Instructions

  1. Place all ingredients in a blender and blend until super smooth.
  2. Add the mixture to a popsicle mold and place in the freezer until frozen. Enjoy!

Notes

I use my Zuko Quick Pop Maker and these are frozen in 7 minutes! (affiliate link)

Nutrition

  • Serving Size: 1 popsicle
  • Calories: 132
  • Sugar: 1 gram
  • Fat: 10 grams
  • Carbohydrates: 5 grams
  • Fiber: 1.75 grams
  • Protein: 6 grams


This is a sponsored conversation written by me on behalf of Silk. The opinions and text are all mine.

If you make this or any Happy Healthy Mama recipe, I would LOVE to see it! Snap a pic and tag me on Instagram or Facebook.

Would you like to save this recipe for later? Here’s an image for you to save to your Pinterest recipe board!

High protein low carb dairy free healthy popsicle recipe!

The post High Protein Low Carb Almond Vanilla Popsicles appeared first on Happy Healthy Mama.


source http://happyhealthymama.com/high-protein-low-carb-almond-vanilla-popsicles.html

Monday 15 May 2017

Strawberry Spinach Salad with Avocado and Strawberry Vinaigrette Dressing

This Strawberry Spinach Salad with Avocado and Strawberry Vinaigrette Dressing is light, healthy, and super quick to prepare! You’re going to love this salad recipe.Strawberry Spinach Salad with Avocado and Strawberry Vinaigrette dressing set up on table
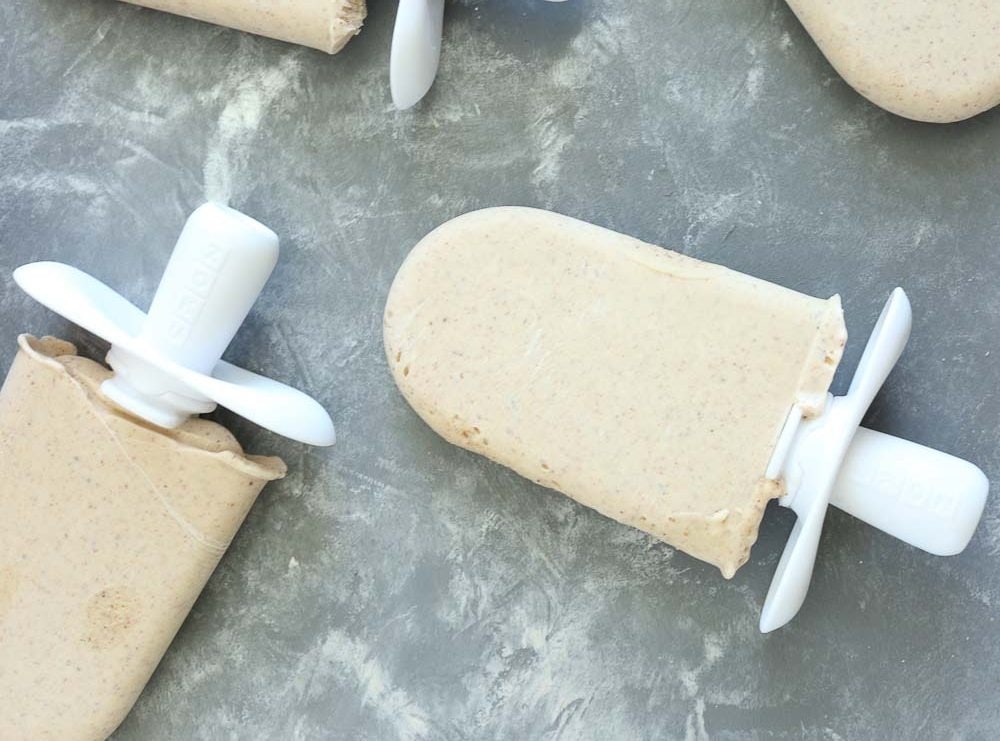
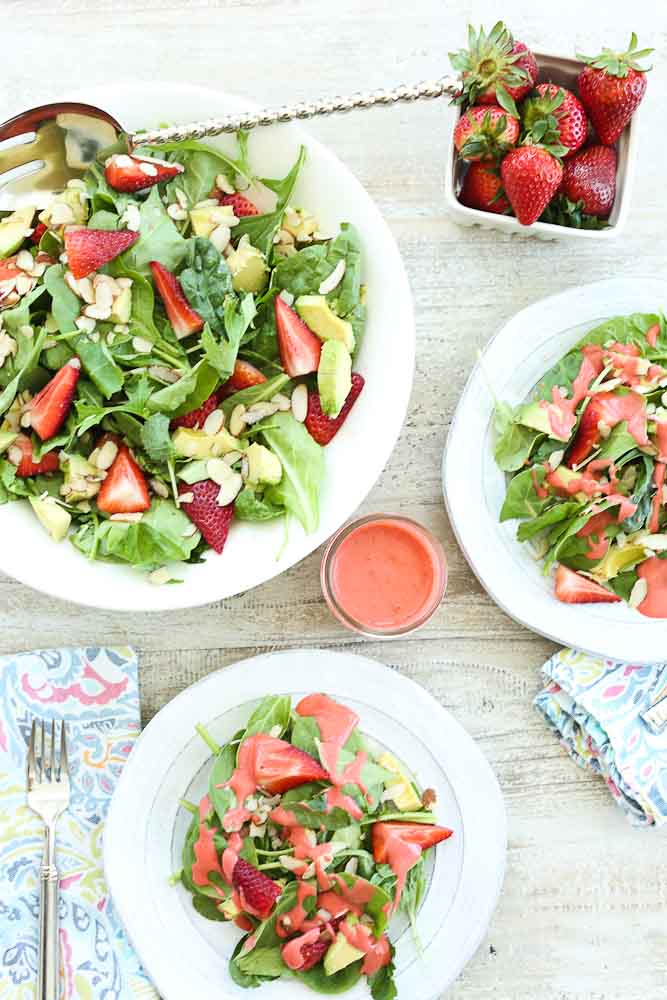
Every girl needs a go-to salad recipe that is equally easy to make and impressive. One that she can throw together in 10 minutes to add it to dinner, bring to a social event, or make a quick lunch. This is that salad.

With minimal chopping, you can throw the salad portion together in about five minutes. It’s got all the usual players you find in a Strawberry Spinach Salad (spinach, strawberries, almonds) with the addition of avocado. Avocado always make a salad better, no?Strawberry Spinach Salad with Avocado and Strawberry Vinaigrette dressing pictured without the dressing
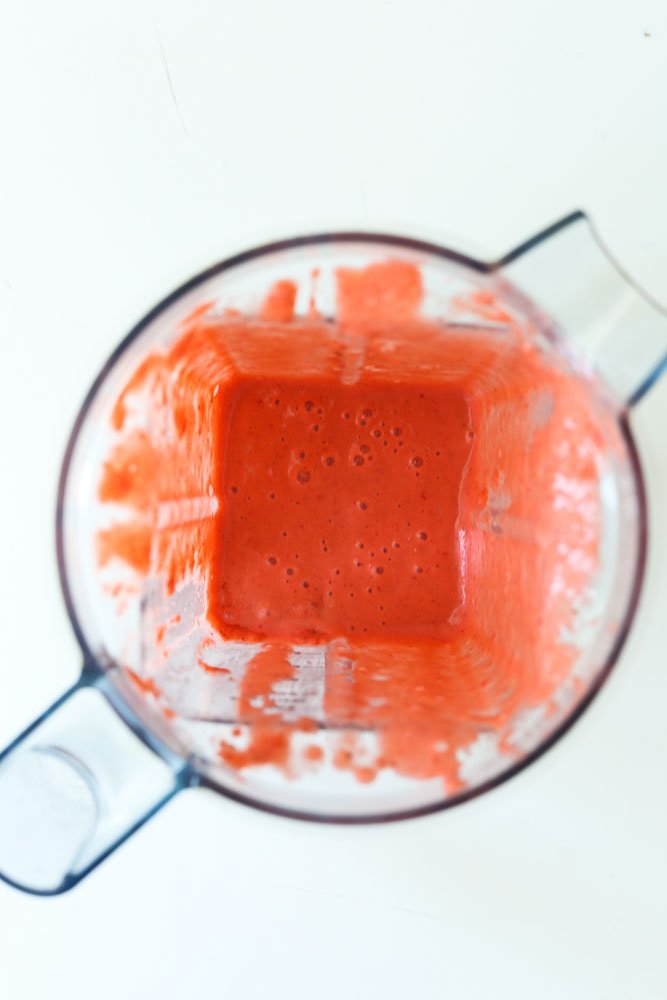
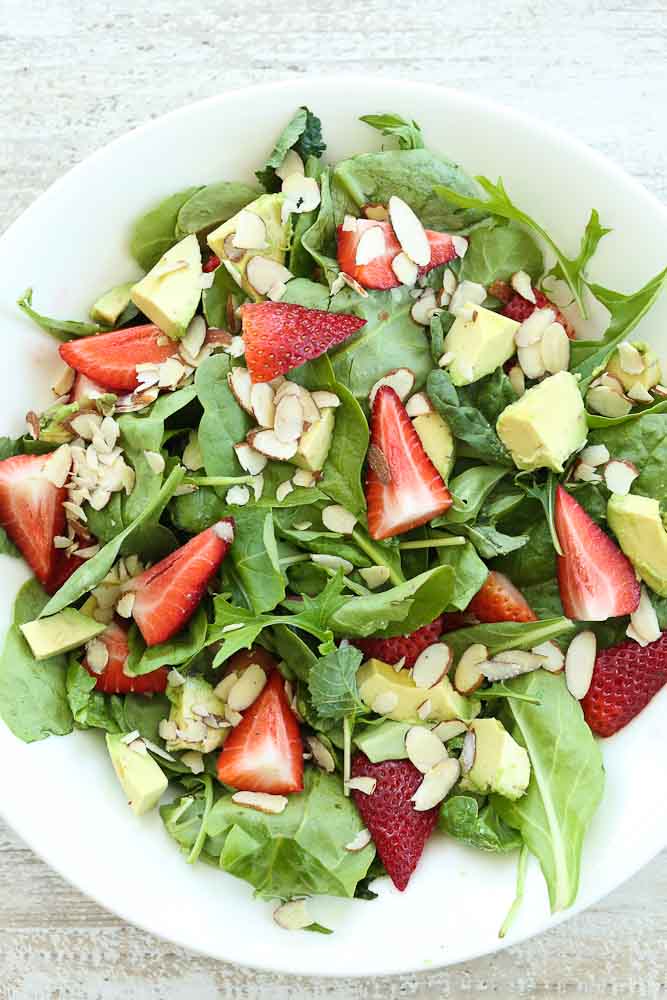
Then there’s the Strawberry Vinaigrette Dressing. It’s as simple and putting a few ingredients in the blender and blending until smooth. We’re talking maybe another five minutes.Strawberry Spinach Salad with Avocado and Strawberry Vinaigrette dressing--making the dressing with ingredients in the blender

This is what adds the impressive factor to this salad. That color! The flavor is tangy and light and it tastes great on the salad.Strawberry Spinach Salad with Avocado and Strawberry Vinaigrette dressing--making the dressing with finished dressing in the blender

Close up picture of Spinach Strawberry Salad with Avocado and Strawberry Vinaigrette

Isn’t this dressing just the prettiest?! —>Insert heart eyes emoji here<—-

You only have to invest ten minutes into this salad. Busy moms, can I get a HELL YEAH?Close up picture of Spinach Strawberry Salad with Avocado and Strawberry Vinaigrette

Many times you’ll find a soft cheese on a Spinach Strawberry Salad, but I don’t add it here. I feel like it would just compete with the avocado and add too much creaminess. By all means, add some goat cheese or feta if you prefer. I won’t judge you for that decision. 😉Strawberry Spinach Salad with Avocado And Strawberry Vinaigrette recipe served

I should also add that you can make this with all spinach, or a mix of spinach and other greens like you see in the photos. I made it with a power greens blend. I like to get as big of a variety of greens as I can, so I usually get a blend rather than all spinach. Strawberry Spinach Salad with Avocado And Strawberry Vinaigrette recipe served

I hope you love this salad as much as I do!

Print

Strawberry Spinach Salad with Avocado and Strawberry Vinaigrette Dressing

Strawberry Spinach Salad with Avocado And Strawberry Vinaigrette recipe served

This Spinach Strawberry Salad with Avocado and Strawberry Vinaigrette is super quick to make, healthy, and delicious!

  • Author:
  • Prep Time: 10 minutes
  • Cook Time: 0 minutes
  • Total Time: 10 minutes
  • Yield: 8 servings

Ingredients

For the Spinach Strawberry Salad with Avocado

  • 8 cups baby spinach or salad blend with spinach
  • salt and pepper
  • 8 large strawberries, hulled and quartered
  • 1 avocado, cut into slices
  • 1/3 cup sliced almonds

For the Strawberry Vinaigrette Dressing

  • 5 large strawberries
  • 2 tablespoons extra virgin olive oil
  • 2 tablespoons fresh lemon juice
  • 1/4 teaspoon ground ginger
  • 1/8 teaspoon white pepper

Instructions

  1. Put your spinach leaves in a large bowl and season with salt and pepper.
  2. Add the strawberries, avocado, and almond slices.
  3. Meanwhile, Put all of the dressing ingredients into a blender and blend until smooth.
  4. Serve the salad with the vinaigrette dressing.

Nutrition

  • Serving Size: 1 cup
  • Calories: 110
  • Sugar: 2 grams
  • Fat: 9 grams
  • Carbohydrates: 7 grams
  • Protein: 3 grams


If you make this or any Happy Healthy Mama recipe, I would love to see it! Snap a picture and tag me on Instagram or Facebook!

Would you like to save this recipe for later? Here’s an image to save to your Pinterest recipe board!

This Strawberry Spinach Salad is made with avocado and the most beautiful strawberry vinaigrette dressing. This is vegan, gluten-free, vegetarian, no sugar added healthy salad recipe!

The post Strawberry Spinach Salad with Avocado and Strawberry Vinaigrette Dressing appeared first on Happy Healthy Mama.


source http://happyhealthymama.com/strawberry-spinach-salad-avocado-strawberry-vinaigrette-dressing.html

Friday 12 May 2017

Easy Lemon Garlic Skillet Chicken Breasts

These Easy Lemon Garlic Skillet Chicken Breasts are simple to prepare and moist with a lovely flavor–your whole family will enjoy this recipe!Easy Lemon Skillet Chicken Recipe--One breast with a lemon on top

This is a recipe that nails the ultimate dinner time trifecta: easy (so simple–minimal ingredients!), it’s healthy, and it’s beyond delicious–everyone in the family loves it. Really, guys, what more could you ask for? It’s Easy Lemon Garlic Skillet Chicken Breasts.

Cast Iron skillet with Easy Lemon Skillet Chicken prepared
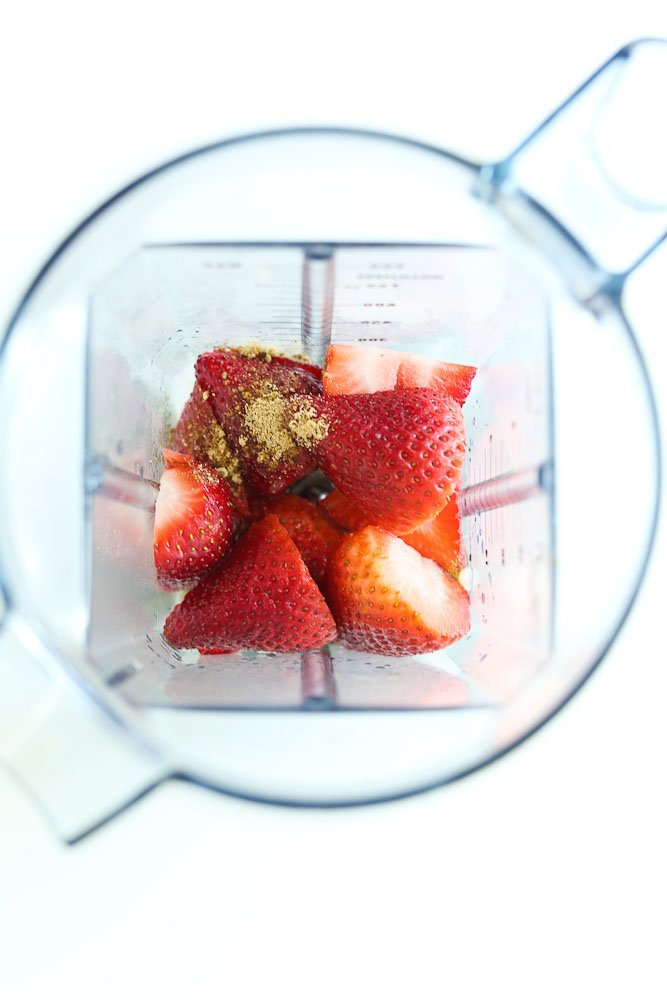
We have a bit of divide in our family. I much prefer chicken thighs to breasts. In my opinion, thighs are so much more flavorful. I am 100% in the minority, though. Tim, Meghan, and Luke all prefer breasts. So while I do serve chicken thighs on occasion, it’s much more common for us to have chicken breasts.

This means I’ve had to work extra hard to create chicken breast dinners that are not dry, bland, and boring. It’s really easy to get sick of chicken breasts.

Close up picture of Easy Lemon Skillet Chicken Recipe in cast iron skillet panUsing my cast iron skillet has become my favorite way to cook chicken breasts. You can use any oven-proof skillet for this, but I highly recommend a cast iron skillet.

I start by browning them on the stove top.

Browning the chicken breasts on the stove top in the cast iron skilletI typically use ghee for this, but you can also use avocado oil or another oil that can withstand higher heat.

Once the chicken breasts are browned, I like to add some flavorful liquid to cook with them in the oven. For this recipe I included chicken stock, mustard, balsamic vinegar, avocado oil, and garlic. This will become our sauce.

Adding liquid to the cast iron skillet with chicken breasts

I also added lemon to cook right on the chicken breasts and in the sauce to add some extra tangy flavor. I adore lemon flavor so much and it really brightens this dish. Serving the Easy Lemon Garlic Skillet Chicken Recipe

Once the chicken breasts are cooked, I add some arrowroot powder to thicken the sauce on the stove and dinner is ready! It’s super simple. I’ll give you some easy side dish ideas that would go well with this dinner at the end of this post, also.Close up picture of cut chicken breast from Easy Lemon Garlic Skillet Chicken recipe

Ready to get cooking? On to the Easy Lemon Garlic Skillet Chicken Breasts recipe!

Print

Easy Lemon Garlic Skillet Chicken Breasts

Close up picture of Easy Lemon Skillet Chicken Recipe in cast iron skillet pan

This recipe is for a lovely weeknight dinner that is fast and simple. Easy Lemon Garlic Skillet Chicken is a family-favorite recipe!

  • Author:
  • Prep Time: 5 minutes
  • Cook Time: 25 minutes
  • Total Time: 30 minutes
  • Yield: 4 servings

Ingredients

  • 2 pounds boneless, skinless chicken breasts (4 breast halves)
  • 1 tablespoon ghee or avocado oil
  • salt and pepper
  • 1/4 cup chicken stock
  • 1 tablespoon dijon mustard
  • 1 tablespoon balsamic vinegar
  • 1 tablespoon avocado oil
  • 2 teaspoons minced garlic
  • 2 lemons, sliced
  • 1/2 teaspoon arrowroot powder+1 teaspoon water

Instructions

  1. Preheat the oven to 400 degrees.
  2. Pat your chicken breasts dry and season them with salt and pepper on both sides.
  3. Heat the ghee in a large cast iron skillet (or other oven-proof skillet) over medium heat until it melts.
  4. Add the chicken breasts to the skillet and cook until browned, about 5 minutes per side.
  5. Meanwhile, whisk together the chicken stock, mustard, vinegar, oil, and garlic.
  6. Pour the mixture into the skillet. Use a spoon or spatula to deglaze the pan. (I don’t always remove the chicken first because I’m kind of a lazy cook. I just work around it. You can totally remove the chicken to do this and then add it back to the skillet if you want.)
  7. Add 1-2 lemon slices to the top of each chicken breast and the remaining slices around them in the pan.
  8. Finish cooking the chicken in the preheated oven until it reaches an internal temperature of 165 degrees, about 12-15 minutes more.
  9. Once the chicken is cooked, remove it from the skillet to a plate and keep it covered to stay warm.
  10. Make a slurry with the arrowroot powder and water in a small bowl.
  11. Bring the sauce to a simmer on the stove top and add the arrowroot slurry. Whisk for one minute and then remove from the heat.
  12. Top each chicken breast with sauce and serve. Enjoy!

Nutrition

  • Serving Size: 1 chicken breast with sauce
  • Calories: 353
  • Sugar: 1.6 grams
  • Fat: 13 grams
  • Carbohydrates: 4.6
  • Protein: 52 grams


If you make this or any other Happy Healthy Mama recipe, I would love to see it! Snap a pic and share it on Instagram or Facebook and tag me @happyhealthymama  Happy cooking! 🙂

If you’d like to save this recipe for later, here’s an image to save to your Pinterest recipe board!

Easy and healthy dinner recipe! Easy Skillet Lemon Garlic Chicken recipe is low carb, Paleo, whole30, gluten-free, and so delicious. Family Favorite.

How about some side dish ideas? I think this would be lovely served with any of the following vegetables side dishes/salads.

Side Dishes to Serve with Easy Lemon Garlic Skillet Chicken Breasts

Honey Mustard Roasted Carrots

Honey Mustard Roasted Carrots

Mushroom Sauté with Rosemary, Garlic, and Red Wine

Mushroom Sauté with Rosemary, Garlic, and Red Wine. This is a quick and easy side dish recipe OR serve it over a bed of polenta for a great vegetarian or vegan main course. Delicious!Luke’s Favorite Broccoli

Luke's Favorite Broccoli--this is the 8 minute side dish that got my son loving broccoli.

The post Easy Lemon Garlic Skillet Chicken Breasts appeared first on Happy Healthy Mama.


source http://happyhealthymama.com/easy-lemon-garlic-skillet-chicken.html