Wednesday, 31 January 2018

How to Cook a Whole Chicken in the Instant Pot

Do you know how to cook a whole chicken in the Instant Pot? This post will show you how–it’s perfect for meal prep or a family dinner!
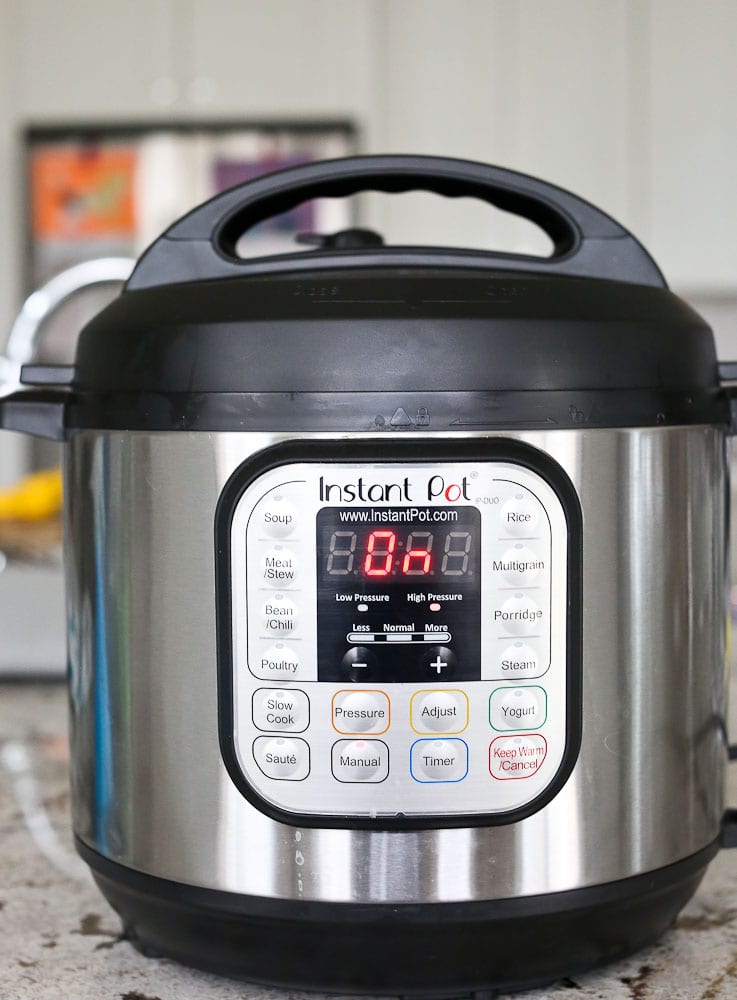
How to Cook a Whole Chicken in the Instant Pot

Please note that links to products may be affiliate links. I appreciate your support!
Click here to subscribe

I’m using my Instant Pot more and more, and I’m finding it to be a real time saver in a lot of ways. My favorite way to save time with the Instant Pot is to use it to cook a whole chicken!

I do this three to four times a month and it is a quick and easy way to cook a whole chicken that is juicy and tender and can be used in a variety of recipes (I’ll link to some great ones later in the post so you know exactly what to do with your Instant Pot whole chicken!)

How To Cook A Whole Chicken in the Instant Pot

  1. Add 1/2-3/4 cup water to your Instant Pot.
  2. Squeeze the juice of half a lemon on the chicken and sprinkle liberally with salt and pepper. Stuff the other half of the lemon inside the bird. How to Cook a Whole Chicken in the Instant Pot the chicken in the pot before cooking
  3. Place the chicken in the pot breast side down and put the top on the Instant Pot.
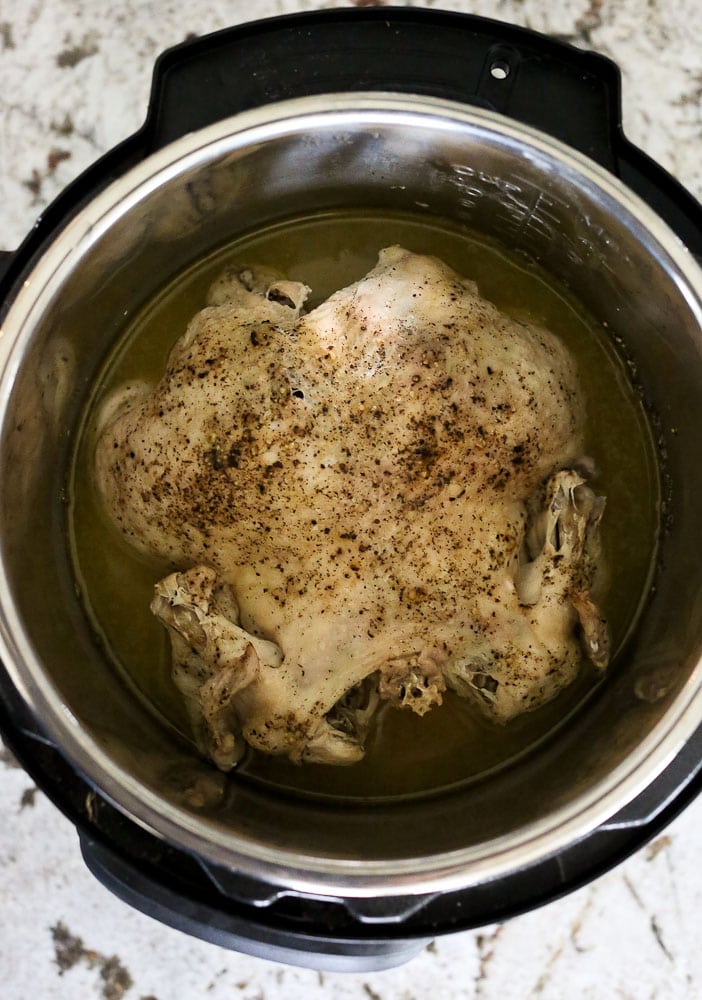
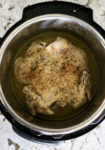
  4. Make sure the vent is in the sealed position, and then press the manual button and set the Instant Pot to high pressure for 7 minutes per pound. (I have a cheat sheet with a list of cooking times for your Instant Pot. Want me to send it to you? Click here to get your Instant Pot Cooking Times Cheat Sheet!   How to Cook a Whole Chicken in the Instant Pot the chicken in the pot after cooking
  5. Once the Instant Pot comes to pressure and then cooks for the amount of time right for the size of chicken you are cooking, allow the pressure to release naturally, about 15-20 minutes. Do not use the quick release method as this will make your chicken dry. Remove chicken and serve or prepare for meal prep.

Notice that I don’t add a lot of seasoning nor do I brown the skin. You can do both of these things if you are serving this Instant Pot whole chicken for dinner.

Use the sauté feature on your Instant Pot to brown the skin, and then use the rack it comes with to keep it out of the liquid. Then use whatever seasoning you normally use on roasted chicken and proceed with the rest of the recipe as written.

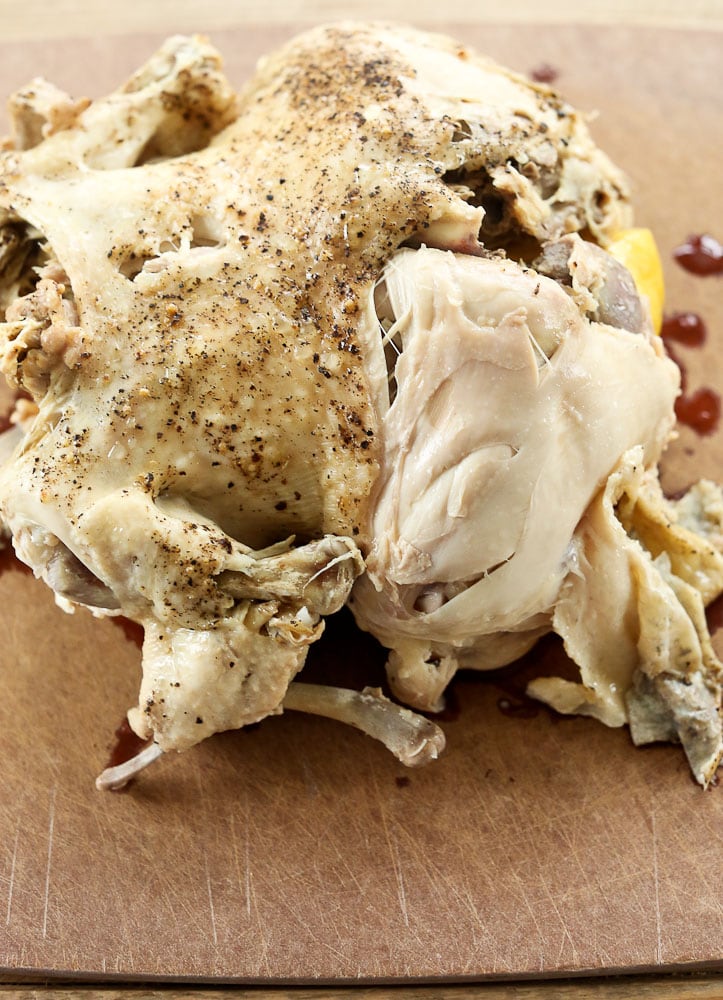
Either way, you’re going to end up with a juicy, moist cooked chicken. How to Cook a Whole Chicken in the Instant Pot the chicken after cooking showing how juicy and moist it is

The reason I don’t brown the skin or season it beyond salt and pepper is that when I use my Instant Pot to cook a whole chicken, I am doing it for meal prep.

Want to know what else the Instant Pot has been fabulous for? Making homemade bone broth! I used to always make slow cooker bone brothI love that it’s a hands off method, but it takes a really long time and I actually don’t like waking up to my house smelling like chicken stock. It’s just not a morning smell.

Bone broth in the Instant Pot takes about 2 hours! My chicken meal prep has been to cook the whole chicken in the Instant Pot, then immediately when I’m done the bones go back into the Instant Pot and I make the bone broth right then. I’m planning to write a post about that next week. 🙂

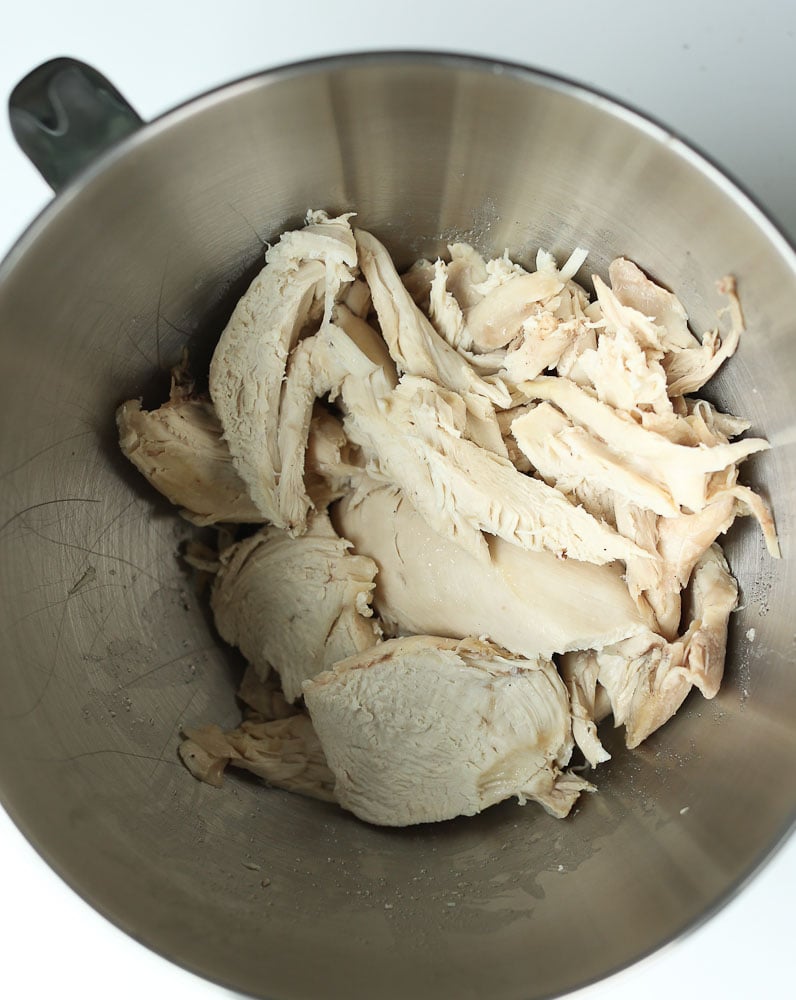
I most often take my meat from the Instant Pot whole chicken and shred it in my Kitchen Aid mixer.

How to cook a whole chicken in the Instant Pot--shredding the cooked chicken after cooking

Do you shred chicken in your stand mixer? It’s another big time saver!How to cook a whole chicken in the Instant Pot--shredding the cooked chicken in the stand mixer

I spy my feet in this picture! 😉

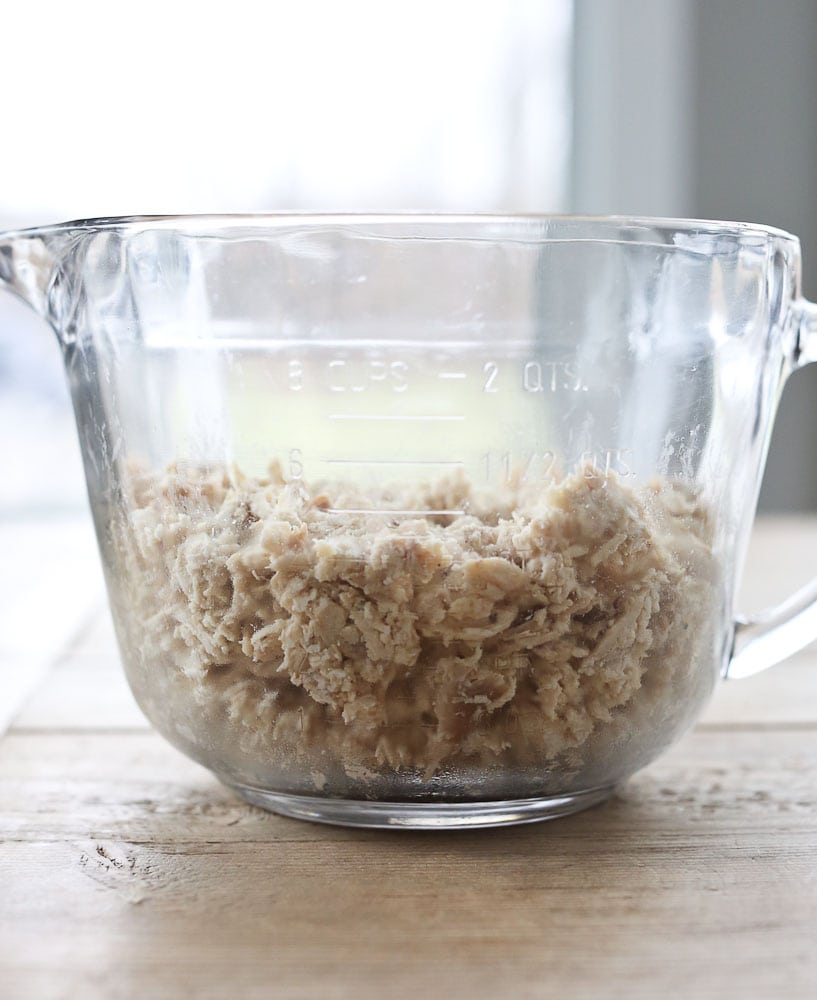
I end up with about 4 cups of shredded chicken from a 3 pound chicken.

How to cook a whole chicken in the Instant Pot--shredding the cooked chicken in the stand mixer 4 cups

So many quick and healthy meals can be made when you have cooked chicken on hand. Here are some of my favorites!

The Best Recipes to Make with Your Instant Pot Whole Chicken

  1. Chicken, Spinach, Mushroom and Feta Stuffed Sweet Potato
  2. Chicken Quinoa Soup
  3. Lightened Up Chicken Pot Pie
  4. One Pot Lemon Parmesan Pasta
  5. 20 Minute Barbecue Chicken Quinoa Bowl
  6. Butternut Squash Rice Bowl

I am convinced that learning how to cook a whole chicken in the Instant Pot can change your life. Here’s the printable recipe for you!

Print

Instant Pot Whole Chicken

How to Cook a Whole Chicken in the Instant Pot the chicken in the pot after cooking

Learn how to cook a whole chicken in the Instant Pot in less than an hour! Perfect for meal prepping!

  • Author: Maryea Flaherty | Happy Healthy Mama
  • Prep Time: 5 minutes
  • Cook Time: 50 minutes
  • Total Time: 55 minutes
  • Yield: 1 whole chicken

Ingredients

  • 1/2-3/4 cup water
  • 1 whole chicken*, giblets removed
  • 1 lemon
  • salt and pepper

Instructions

  1. Add 1/2-3/4 cup water to your Instant Pot.
  2. Squeeze the juice of half a lemon on the chicken and sprinkle liberally with salt and pepper. Stuff the other half of the lemon inside the bird.
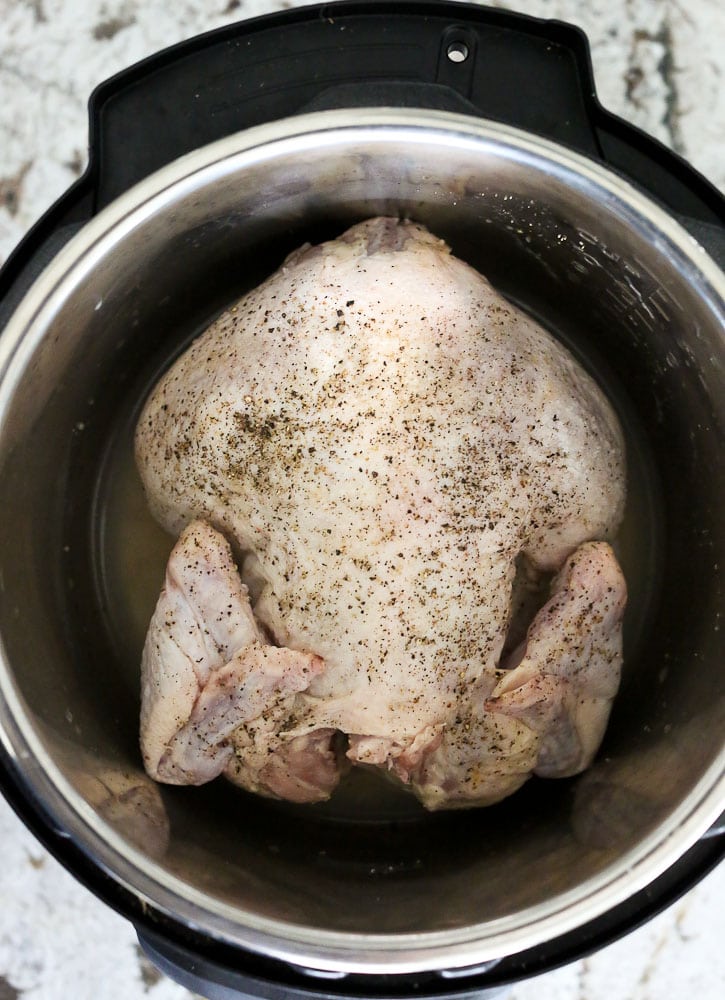
  3. Place the chicken in the pot breast side down and put the top on the Instant Pot.
  4. Make sure the vent is in the sealed position, and then press the manual button and set the Instant Pot to high pressure for 7 minutes per pound. (3 pounds=21 minutes)
  5. Once the Instant Pot comes to pressure and then cooks for the amount of time right for the size of chicken you are cooking, allow the pressure to release naturally, about 15-20 minutes. Do not use the quick release method as this will make your chicken dry. Remove chicken and serve or prepare for meal prep.

Notes

*I use a 6 quart Instant Pot. I buy organic chicken and they are typically smaller than conventional chickens, mine average 2.5-4 pounds.

Nutrition

  • Serving Size: 4 ounces
  • Calories: 271


If you love my recipes and want inspiration for living a happy and healthy life, I would LOVE to keep in touch! Follow Happy Healthy Mama! Find me on:

Facebook

Instagram

Pinterest

If you make this Instant Pot Whole Chicken recipe, or any Happy Healthy Mama recipe, I would LOVE to see it! Please take a pic and share it on Instagram or the Happy Healthy Mama Facebook page and tag me @happyhealthymama ðŸ™‚

Also, if you try it, would you mind rating the recipe with stars when you leave a comment? It’s VERY helpful for me and other readers if the recipes have ratings and reviews. I appreciate you!

If you’d like to save this recipe for later, here’s an image to save to your Pinterest recipe board!

The post How to Cook a Whole Chicken in the Instant Pot appeared first on Happy Healthy Mama.


source https://happyhealthymama.com/how-to-cook-a-whole-chicken-in-the-instant-pot.html

Monday, 29 January 2018

Hot Corn Dip Recipe

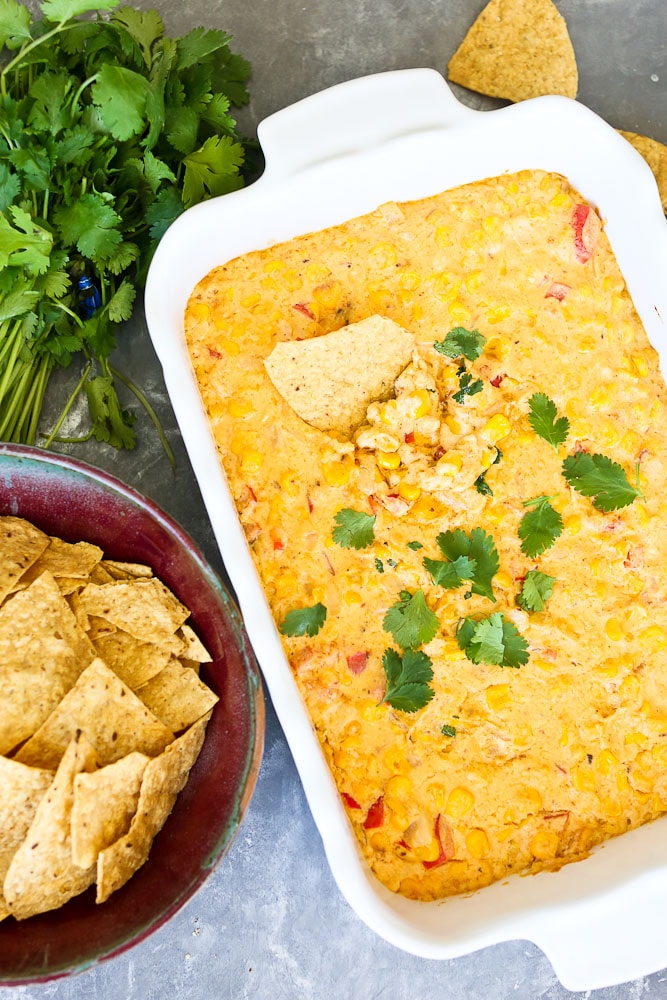
This Hot Corn Dip recipe is a crowd-pleasing, cheesy dip that always disappears quickly!Hot Corn Dip Recipe next to a bowl of chips with a chip in the dip

Tim and I usually have a few friends over for the Super Bowl and we never agree on the menu. He wants to serve pizza and wings and I want to serve more, er, veggie-centric dishes.

We usually meet somewhere in the middle.

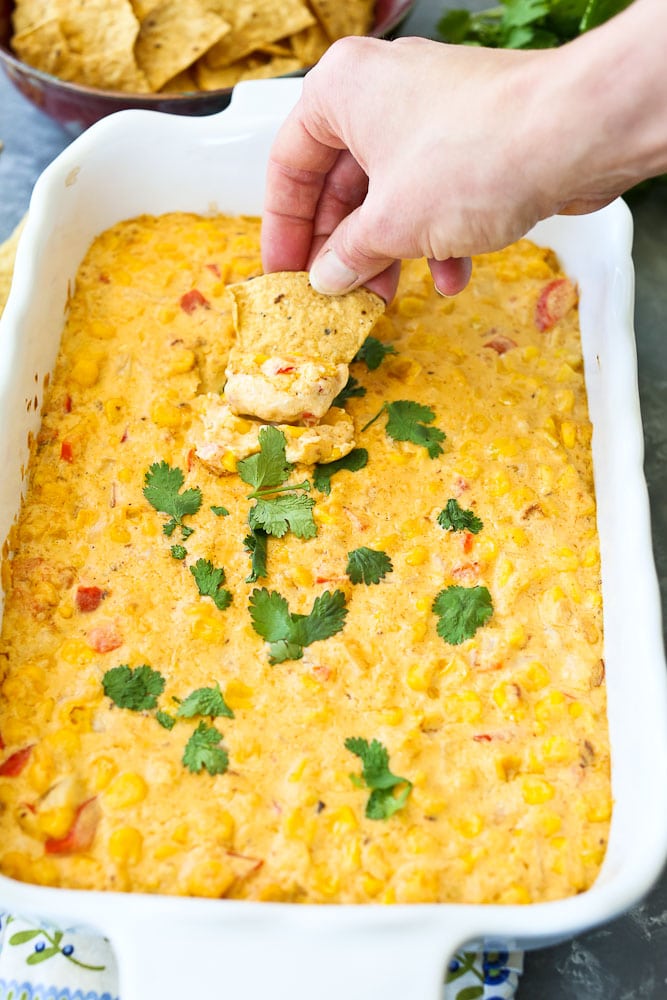
One thing we don’t have to compromise on is we both want flavorful, crowd-pleasing appetizers. This Hot Corn Dip recipe delivers. Hot Corn Dip Recipe the whole dish taking a scoop with a chip

Hot dips are always winners in  my book (hello, Spinach Artichoke Dip and Buffalo Chicken Dip), and this one does not disappoint. It’s got plenty of cheese that gives this that addictive factor, mixed with corn, onion, red pepper, garlic, and just a touch of cayenne to give it a little heat. Feel free to add more if you want to kick it up a few more notches.

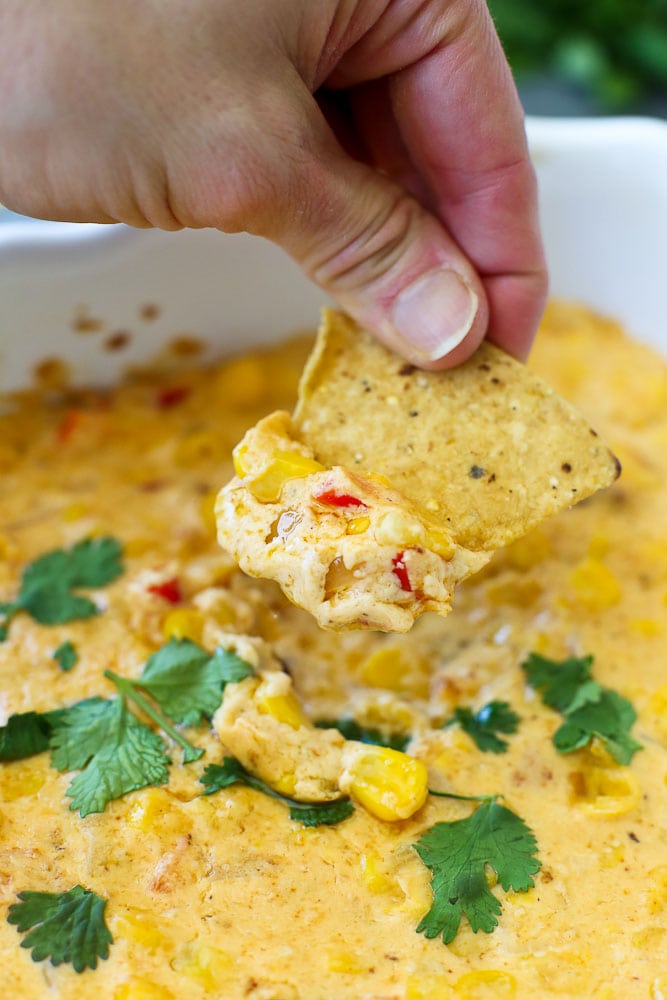
Hot Corn Dip Recipe-close up of taking a chip into the cheesy dipI guarantee you won’t be able to stop eating this Hot Corn Dip recipe!

How to Make This Addictive Hot Corn Dip Recipe

Print

Hot Corn Dip Recipe

Hot Corn Dip Recipe-close up of taking a chip into the cheesy dip

This Hot Corn Dip Recipe is cheesy, a little spicy, and is always a crowd pleaser!

  • Author: Maryea Flaherty | Happy Healthy Mama
  • Prep Time: 15 minutes
  • Cook Time: 20-30 minutes
  • Total Time: -25287158.3833 minute
  • Yield: 12 servings

Ingredients

  • 1 tablespoon butter
  • 1 small onion, diced
  • 1 teaspoon minced garlic
  • 1 small red bell pepper, diced
  • 4 cups corn kernels (frozen is fine)
  • 8 ounces cream cheese, softened and cut into cubes
  • 1 1/2 cups shredded Monterey Jack cheese or Mexican cheese blend
  • 1/2 cup plain nonfat Greek yogurt
  • 1/2 cup mayonnaise
  • 1/4 teaspoon cayenne pepper
  • 1/2 teaspoon chili powder

Instructions

  1. Preheat the oven to 350 degrees.
  2. In a large skillet, melt the butter. Add the diced onion and red bell pepper and sauté until softened, about 5 minutes. Add the garlic and let cook another minute. Remove from heat.
  3. Add the rest of the ingredients* and mix well. Transfer the mixture to a medium baking dish.
  4. Bake in the preheated oven until the dip is  hot and bubbly, 20-30 minutes. Serve with tortilla chips. Enjoy!

Notes

*I like to add all the ingredients in the skillet and then transfer to the baking dish. If your skillet is not large enough, you can mix it all together right in the baking dish.

Nutrition

  • Serving Size: 1/12 of recipe
  • Calories: 189
  • Sugar: 5.3 grams
  • Fat: 13 grams
  • Carbohydrates: 12 grams
  • Protein: 7.6 grams


If you love my recipes and want inspiration for living a happy and healthy life, I would LOVE to keep in touch! Follow Happy Healthy Mama! Find me on:

Facebook

Instagram

Pinterest

or sign up for my free weekly newsletter, where I send my best health tips and inspiration—>

If you make this Hot Corn Dip recipe, or any Happy Healthy Mama recipe, I would LOVE to see it! Please take a pic and share it on Instagram or the Happy Healthy Mama Facebook page and tag me @happyhealthymama ðŸ™‚

Also, if you try it, would you mind rating the recipe with stars when you leave a comment? It’s VERY helpful for me and other readers if the recipes have ratings and reviews. I appreciate you!

If you’d like to save this recipe for later, here’s an image to save to your Pinterest recipe board!Hot Corn Dip Recipe #superbowl #appetizer #cheese #dip

The post Hot Corn Dip Recipe appeared first on Happy Healthy Mama.


source https://happyhealthymama.com/hot-corn-dip-recipe.html

Saturday, 27 January 2018

Stitch Fix Lately (Favorites from Fall and Winter 2018)

Well, hello there! It’s been AGES since I’ve shared any fashion posts with you. I put a poll out on Instagram stories asking if you wanted them back on Happy Healthy Mama and 95% of you said YES.

Because life is about so much more than just food, right?

How about some of my favorite Stitch Fix pieces I’ve gotten lately? I don’t get a fix every month anymore, more like every 2-3 months, but I still love them as an easy way to add to my wardrobe and keep it fresh and updated.

It’s so easy as busy moms to forget about ourselves. Don’t do that! Let’s take a look at what I’ve loved from Stitch Fix this fall and winter. (Please note that links to products are affiliate links.) 

Stitch Fix Favorites Fall and Winter 2018

One reason I stopped posting any fashion posts in the first place was I always felt like my photos were ridiculously bad and I felt like if I couldn’t get professional-looking pics I didn’t want them on my blog. Welllll I still haven’t figured out how to make that happen. Yeah, I look like I’m going to fall off the Earth on this crooked picture. Ha!

This sweater from Collection by Bobeau was in my fall fix and I love it. It’s suuuuper soft, which is basically what sold me on it. The jeans I’m wearing here are not from Stitch Fix, but they are 7 for all Mankind Josefina Feminine Boyfriend jeans and they are the softest, most comfortable jeans ever. The boots are from Cole Haan.

The lightweight sweater is longer in the back with a slit. I’ve worn it a ton since I got it, so that’s a sign of a good purchase in my book.Stitch Fix Lately-collection by bobeau top

This is a Leo and Nicole sweater I also got in my fall fix. When I took it out of the box and looked at it, I was kind of meh about it, but once I put it on I changed my mind.

Stitch Fix Lately-Leo and Nicole sweater stitch fix winter 2018

It has a super cute poncho look to it that I didn’t expect.

Stitch Fix Lately-leo and michelle sweater

These jeans are from Just Black Denim and I got them in a fix last year. The boots are from Frye and are my all-time favorites. (These are similar.)

I really like the cut of the sweater from the side.

Stitch Fix Lately-leo and michelle sweater

Here I am wearing three pieces I got in both my fall and winter fixes. It’s the Kafton Lace Up Sweater from Lemon Tart, Joe’s Jeans Midrise Icon Skinny, and Irven Faux Suede Bootie (similar) from Steve Madden.

Stitch Fix Lately-winter 2018

I like that this sweater is warm (it’s been so cold this winter!) and has fun tie-up detail.

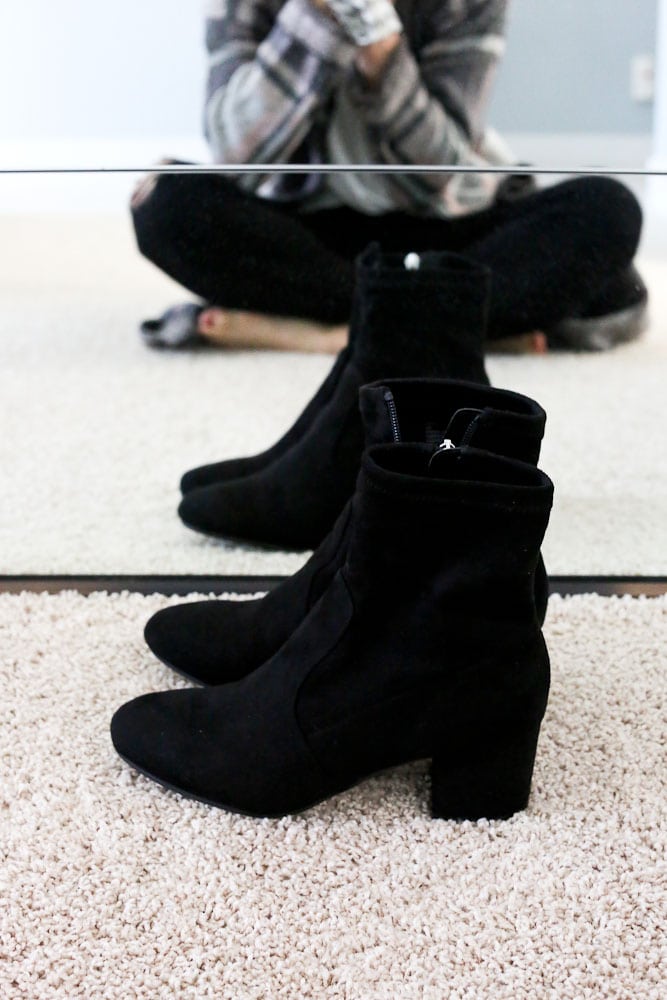
I asked for black booties because mine have been worn to pieces, and I really like these. They have a comfortable block heel and can be dressed up or down. Here’s a better look at the boots. Stitch Fix Lately-steve madden boots

These jeans are SO amazing. The mid rise is perfect. High enough that they stay put and are comfortable (nothing shows when I bend down!) yet not so high that I feel like I’m trying to dress like a ultra trendy youngin’. 😉 Stitch Fix Lately- Joes jeansStitch Fix Lately- Joes jeans

They also don’t lose their fit and get baggy after wearing them a few hours. That’s my biggest pet peeve when it comes to jeans! So worth paying more to get jeans that hold their fit.

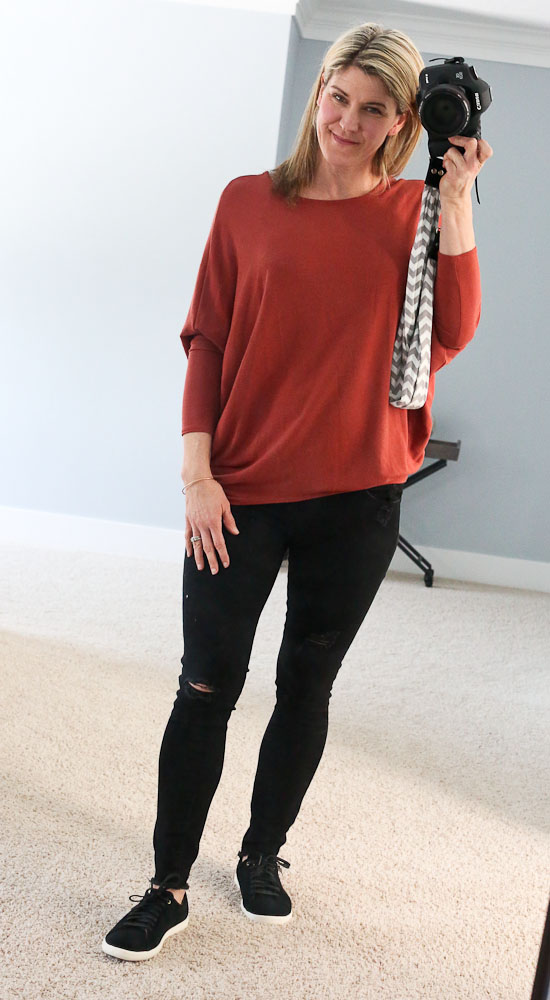
I got this Reid French Terry Knit top from Jolie and black sneakers from Cole Haan in my winter fix. The top is super comfortable and perfect for everyday wear. I can’t remember where I got these black distressed jeans, but they are from Articles of Society and I love them!

Stitch Fix Lately-Reid French Terry Knit Top

I asked for a casual sneaker and love these.

Stitch Fix winter 2018 cole haan lace up sneaker

This is the last piece I got in my winter fix that I was totally on the fence about. It’s the Raelynn Knit Duster Jacket from Evolution by Cyrus. It’s a pretty trendy piece that I wasn’t sure if I’d wear enough, but I put it on and felt like a total badass. Plus I liked everything else in my fix, so keeping it made sense to get the 25% off discount. So I kept it. What do you think?Stitch Fix Lately-winter 2018 raelynn knit duster jacket

These are my newest Stitch Fix pieces!

All right friends, talk to me. What do you think about bringing back fashion posts to HHM? You won’t hurt my feelings. 🙂 I’d love your thoughts!

If you want to try Stitch Fix, I’d love it if you’d sign up from my link—> TRY STITCH FIX


The post Stitch Fix Lately (Favorites from Fall and Winter 2018) appeared first on Happy Healthy Mama.


source https://happyhealthymama.com/stitch-fix-lately-favorites-fall-winter-2018.html

Friday, 26 January 2018

Banana Nut Baked Oatmeal Muffins

These Banana Nut Baked Oatmeal Muffins are easy to make in one bowl and are a healthy, portable breakfast that is great for making ahead for busy mornings!Banana Nut Oatmeal Muffins breakfast Cups recipe One cup close up

Baked oatmeal muffins have been a staple in our family since Meghan was a toddler and Luke was a baby. I love that you can make them ahead of time and have a healthy, nourishing breakfast ready to go for busy mornings.

Lately, I’ve realized that I need a heartier baked oatmeal muffin. I absolutely love these Apple Cinnamon Baked Oatmeal Muffins, for example, but I need to eat about four of them to feel satisfied in the morning.

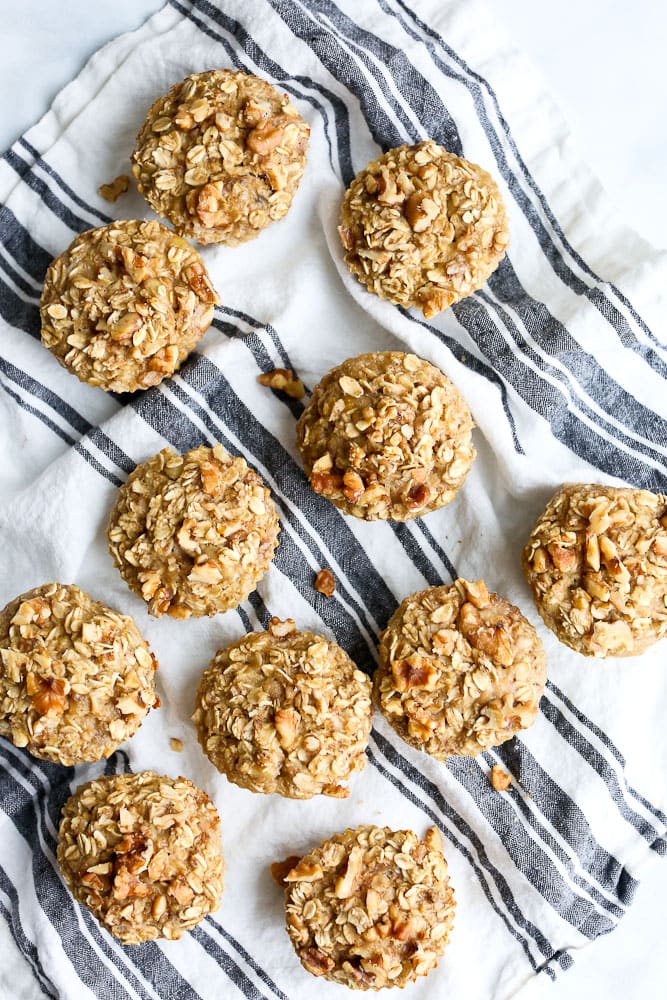
So I created these Banana Nut Baked Oatmeal Muffins to be a heartier, more filling breakfast option where we wouldn’t eat the entire pan in one day. Banana Nut Oatmeal Muffins breakfast Cups overhead shot of a bunch of muffins

I added more oats, more eggs, and more almond milk, but still cooked them in the same amount of muffin cups. This made for a bigger, more caloric muffin. It did the trick!

If you love Banana Nut Muffins, you’ll love these healthy Banana Nut Baked Oatmeal Muffins. If you’ve never made baked oatmeal muffins before, you should know that they aren’t exactly like muffins. They are more like a cross between a muffin and baked oatmeal.

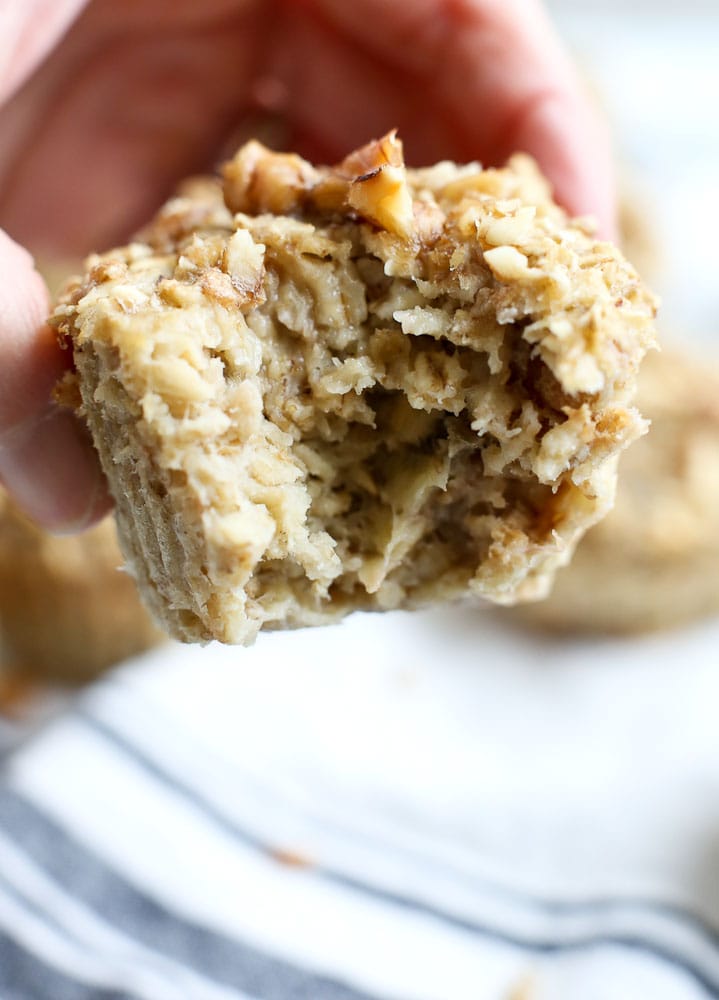
They hold together enough so they are portable and you don’t need to eat them with a spoon, but they are soft and baked-oatmeal-like in the center.

Banana Nut Oatmeal Muffins breakfast Cups recipe one muffin with a bite out of it

These are lightly sweet. They have three bananas which give them a nice banana flavor and natural sweetness, and then just a small amount of honey to add more sweetness. They are not, however, a super sweet muffin. If that’s what you’re looking for, I’d add about 1/4 cup coconut sugar or sucanat to the batter. (<—affiliate links)

You can use this as a base recipe to customize your muffins!

Ideas to Customize your Banana Nut Baked Oatmeal Muffins

  • Instead of walnuts, use pecans.
  • Add 1/2-3/4 cup raisins.
  • Add 1/2-3/4 cup chocolate chips. (<—my kids would love this!)
  • Omit the nuts and add some chopped berries.
  • Add up to 1 cup shredded carrot or zucchini for an extra veggie boost!

If you have any more ideas for customization, add them in the comments! I hope you love this recipe for Banana Nut Baked Oatmeal Muffins as much as we do.

Print

Banana Nut Baked Oatmeal Muffins

Banana Nut Oatmeal Muffin Cups recipe One cup close up

These Banana Nut Baked Oatmeal Muffins are easy to make in one bowl, naturally sweetened, and a healthy, hearty, portable breakfast idea!

  • Author: Maryea Flaherty | Happy Healthy Mama
  • Prep Time: 5 minutes
  • Cook Time: 25 minutes
  • Total Time: 30 minutes
  • Yield: 12 muffins

Ingredients

  • 3 large ripe bananas
  • 1 1/2 cups unsweetened almond milk (or milk of choice)
  • 2 eggs
  • 1 1/2 teaspoon pure vanilla extract
  • 3 cups old fashioned rolled oats
  • ½ teaspoon salt
  • 1 1/2 teaspoon baking powder
  • 1 cup walnut pieces, chopped

Instructions

  1. Preheat the oven to 350 degrees.
  2. Lightly grease 12 muffin cups or line with silicone baking cups. (affiliate link)
  3. In a medium bowl, mash the bananas well.
  4. Add the milk, eggs, and vanilla and stir to combine.
  5. Add the oats, salt, and baking powder and stir to combine.
  6. Stir in 3/4 cup walnuts.
  7. Pour the mixture into the muffin cups and sprinkle the remaining walnuts on top.
  8. Bake in the preheated oven for 25 minutes. Enjoy!

Nutrition

  • Serving Size: 1 muffin
  • Calories: 190
  • Sugar: 4.6 grams
  • Fat: 7.5 grams
  • Carbohydrates: 23.7 grams
  • Protein: 5.6 grams


If you love my recipes and want inspiration for living a happy and healthy life, I would love to keep in touch! Follow Happy Healthy Mama! Find me on:

Facebook

Instagram

Pinterest

or sign up for my free weekly newsletter, where I send my best health tips and inspiration—>

If you make this Banana Nut Baked Oatmeal Muffins recipe, or any Happy Healthy Mama recipe, I would LOVE to see it! Please take a pic and share it on Instagram or the Happy Healthy Mama Facebook page and tag me @happyhealthymama ðŸ™‚

Also, if you try it, would you mind rating the recipe? It’s VERY helpful for me and other readers if the recipes have ratings and reviews. I appreciate you!

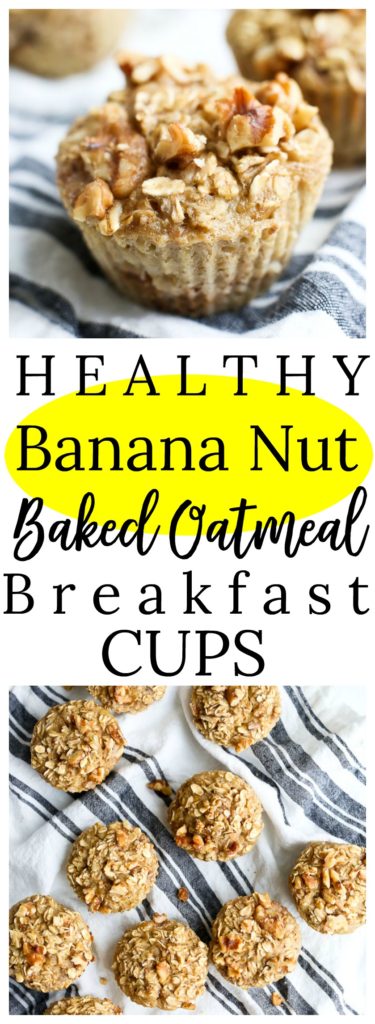
If you’d like to save this recipe for later, here’s an image to save to your Pinterest recipe board!Banana Nut Baked Oatmeal Breakfast Cups #healthy #makeahead #glutenfree #easy #breakfast #oatmeal #muffins


The post Banana Nut Baked Oatmeal Muffins appeared first on Happy Healthy Mama.


source https://happyhealthymama.com/banana-nut-baked-oatmeal-muffins.html

Wednesday, 24 January 2018

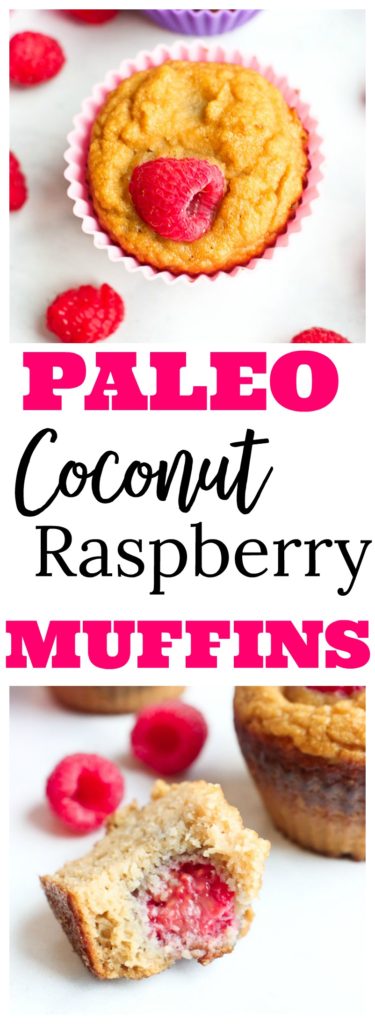
Paleo Raspberry Coconut Muffins


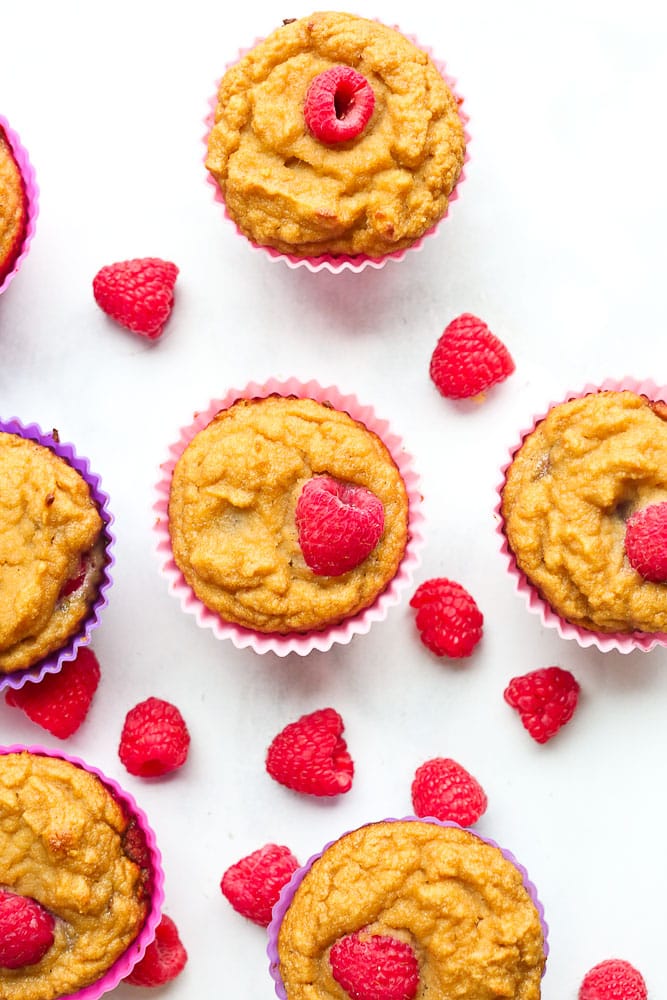
These Paleo Raspberry Coconut Muffins are grain-free and higher in protein than most muffins! Best of all–the whole family loves them. Paleo Raspberry Coconut Muffins recipes muffins with fresh raspberries

Heads up! This recipe for Paleo Raspberry Coconut Muffins was originally published in 2012. Photos were updated January 2018. We love these healthy muffins–enjoy!

Thank you all for your encouraging words on yesterday’s one month postpartum update.  It was uplifting to read how many of you have had similar experiences as you transitioned from one to two children.

Everyday seems to get a little easier.  Meghan is much more demanding of my attention than usual, but I know this won’t last forever.  One thing I have done to try to help is take advantage of when Luke is napping and find things that Meghan and I can do together.Paleo Raspberry Coconut Muffins recipe close up shot of one muffin

Letting her help me in the kitchen is a win-win because I get some much-needed snacks made while we are spending quality one-on-one time together.  She’s had fun helping me make these muffins twice in the past week.

Breastfeeding has given me a voracious appetite, so having healthy snacks on hand at all times is important.  These muffins fit the bill perfectly. I’ve been enjoying them as snacks, while Tim and Meghan have been loving them as a sweet dessert after dinner.  Who says muffins are strictly a breakfast food?

If you haven’t tried coconut flour yet, it’s definitely worth picking some up.  You can make a variety of grain-free, lower carb baked goods with it that are chock full of fiber.  It has a natural sweetness to it, too, so you can use less sweeteners, as well.  Plus, it’s a great gluten-free option for those who can’t tolerate gluten.  Look for it in the health food section of your grocery store or grab some on Amazon. (aff link)

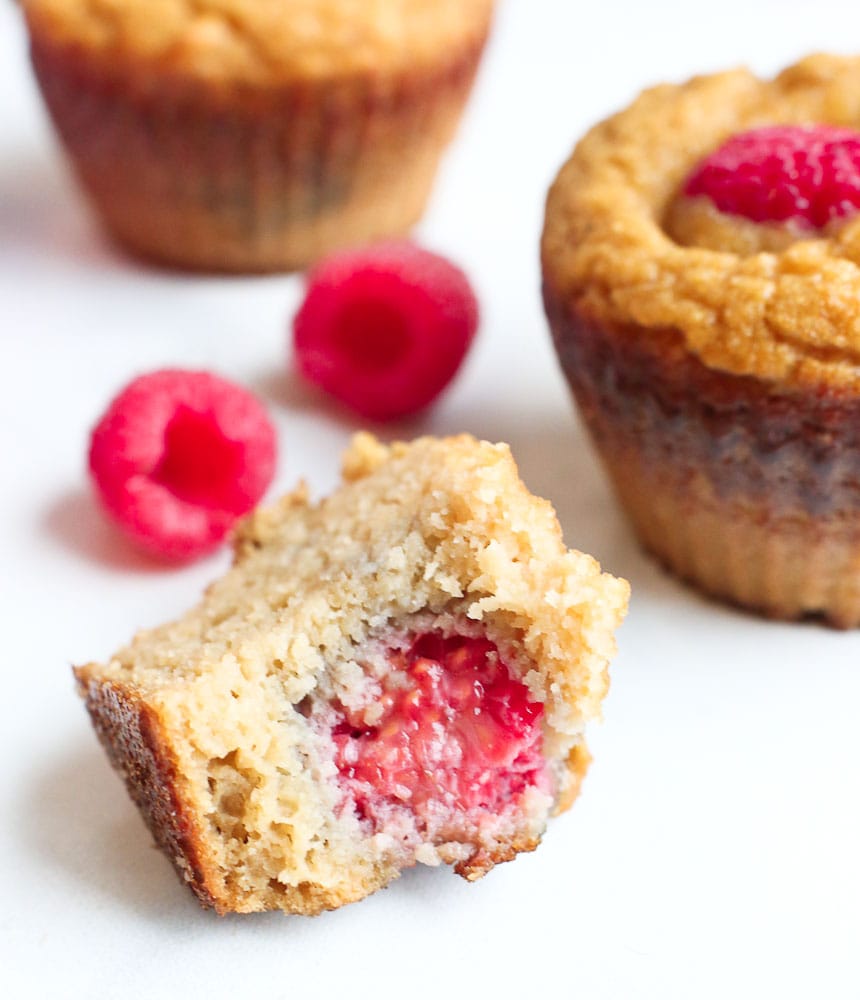
Check out the lovely texture!Paleo Raspberry Coconut Muffins inside texture

Print

Paleo Raspberry Coconut Muffins

Paleo Raspberry Coconut Muffins recipe close up shot of one muffin

These light muffins are grain-free, dairy-free, gluten-free and naturally delicious!

  • Author: Happy Healthy Mama
  • Prep Time: 10 minutes
  • Cook Time: 25 minutes
  • Total Time: 35 minutes
  • Yield: 8 muffins

Ingredients

1/2 cup coconut flour

1/2 teaspoon baking soda

1/4 teaspoon salt

4 large eggs

1/3 cup pure maple syrup

1/3 cup unsweetened apple sauce

2 teaspoons pure vanilla extract

2 tablespoons coconut oil, melted (you can also use melted butter)

3/4 cup raspberries (fresh or frozen)

unsweetened shredded coconut, optional

Instructions

  1. Preheat the oven to 350 degrees. Line 8 cups of a muffin tin with paper liners and spray with non-stick cooking spray or use silicone muffin cups*; set aside.
  2. In a small bowl, whisk together the coconut flour, baking soda, and salt.  Set aside.
  3. In a large bowl, whisk together the eggs, maple syrup, apple sauce, vanilla extract, and coconut oil.  Add the dry ingredients to the wet and whisk well until the mixture is thick and without lumps.
  4. Pour 1/8 cup of the batter into each cup.  Drop a few raspberries on top of the batter.  Pour ~1/8 cup of the batter on top of the raspberries.  Next, drop a few more raspberries on top of each muffin and sprinkle with a little of the shredded coconut, if using.
  5. Bake in the preheated oven for approximately 25 minutes, or until the muffins start to turn golden brown.
  6. Allow to cool in the pan for 5 minutes, and then transfer to a wire rack to cool completely.  Enjoy!

Notes

*affiliate link

Nutrition

  • Serving Size: 1 muffin
  • Calories: 153
  • Sugar: 10.4 grams
  • Fat: 7.3 grams
  • Carbohydrates: 16 grams
  • Protein: 4.4 grams


For a gluten-free, grain-free baked good, these muffins have an amazing texture.  The flavor is lightly sweet with a subtle, not overpowering coconut flavor.  The stats on these are impressive, too.

If you make these Paleo Raspberry Coconut Muffins, or any Happy Healthy Mama recipe, I would LOVE to see it! Please take a pic and share it on Instagram or the Happy Healthy Mama Facebook page and tag me @happyhealthymama ðŸ™‚

Also, if you try it, would you mind rating the recipe? It’s VERY helpful for me and other readers if the recipes have ratings and reviews. I appreciate you!

If you’d like to save this recipe for later, here’s an image to save to your Pinterest recipe board!

Paleo Raspberry Coconut Muffins Recipe #paleo #healthy #grainfree #glutenfree #norefinedsugar #healthy


The post Paleo Raspberry Coconut Muffins appeared first on Happy Healthy Mama.


source https://happyhealthymama.com/grain-free-raspberry-coconut-muffins.html

Friday, 19 January 2018

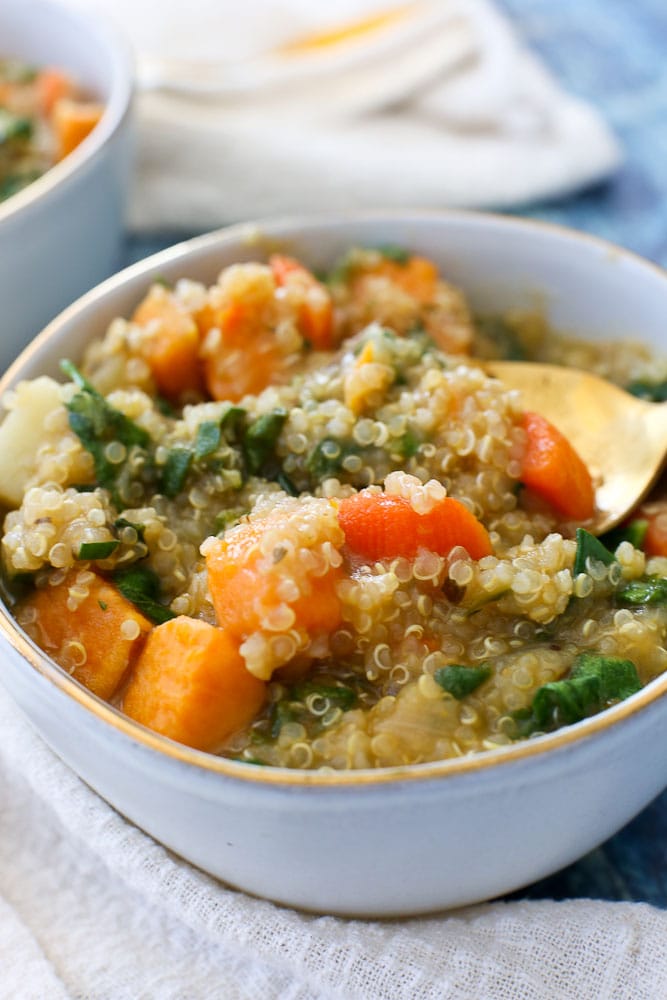
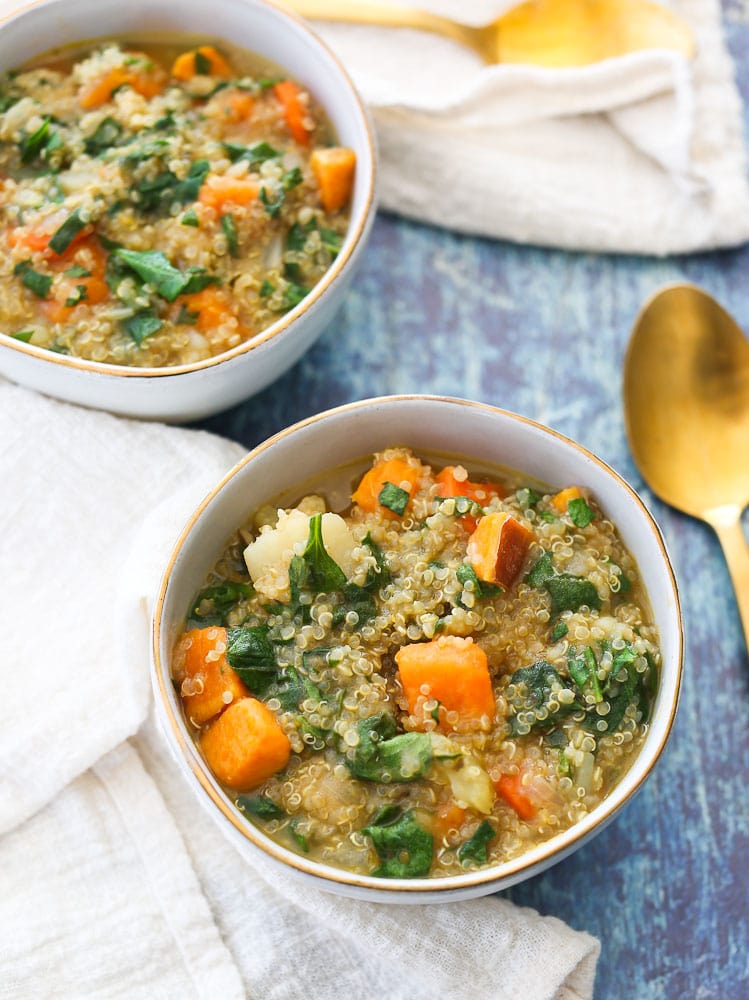
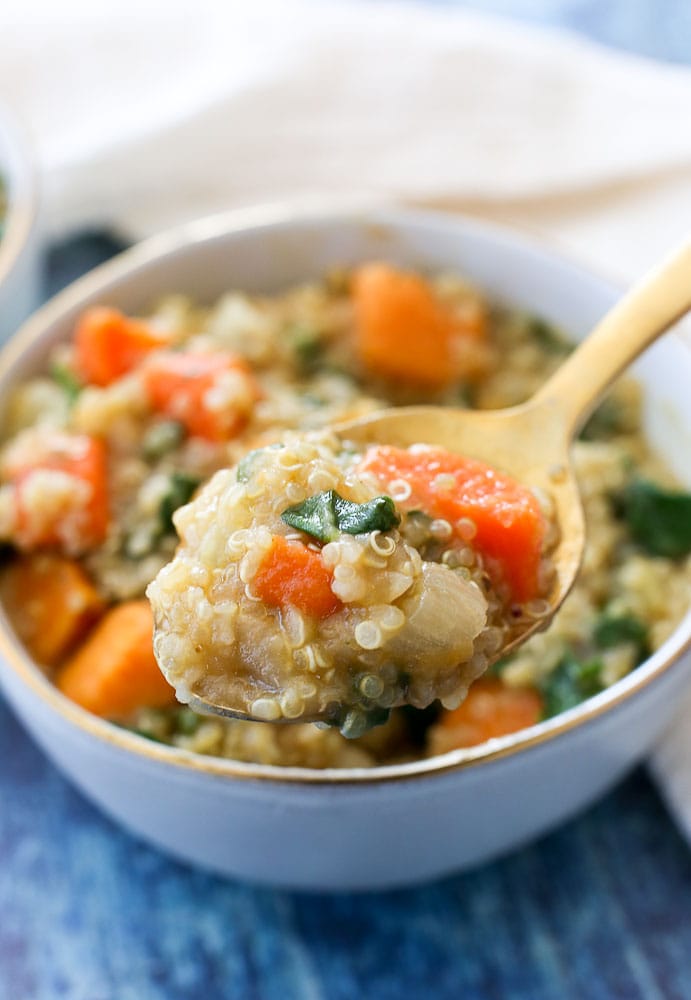
Quinoa Vegetable Stew Recipe

This Quinoa Vegetable Stew is the ultimate healthy comfort food! Vegan, gluten free, and full of nourishing vegetables, it’s hearty and filling. Quinoa Vegetable Stew Recipe

Heads up! This post was first published January 2012. Photos have been updated and recipe notes to reflect variations I’ve made through the years. Enjoy!

These days, it’s a major accomplishment when I’m able to get into the kitchen and make a meal that takes longer than 15-20 minutes to prepare.  When I do, it’s got to last me a few days.Quinoa Vegetable Stew recipe in a bowl

This stew is perfect because I made a big pot and we were good to go for three days of lunches.  And what’s better than a bowl of warm, comforting stew on these dark, wintery days?  Not much.

Completely vegan and filled with vegetables, this stew is as healthy as it is comforting.  What are you talking about?  Healthy comfort food is not an oxymoron.  Try this stew and you’ll be convinced.

Quinoa Vegetable Stew recipe


Print

Quinoa vegetable stew

Quinoa Vegetable Stew recipe

This Quinoa Vegetable Stew is the ultimate healthy comfort food! Vegan, gluten free, and full of nourishing vegetables, it’s hearty and filling.

  • Author: Happy Healthy Mama
  • Prep Time: 15 minutes
  • Cook Time: 40 minutes
  • Total Time: 55 minutes
  • Yield: 6 servings

Ingredients

  • 2 tablespoons extra virgin olive oil
  • 1 yellow onion, chopped
  • 2 carrots, chopped
  • 2 stalks celery, chopped
  • 2 medium potatoes (sweet, white, or red all work), cubed
  • 1 1/2 teaspoons oregano
  • 1 teaspoon marjoram
  • 1 1/2 teaspoons salt, divided
  • 1/4 teaspoon freshly ground black pepper
  • 8 cups vegetable broth
  • 3 cups greens, such as kale or baby spinach, chopped
  • 1 cup quinoa, rinsed
  • 2-3 tablespoons fresh lemon juice

Instructions

  1. Heat the olive oil in a large stock pot or dutch oven.  Add the onion, carrots, celery and 1/2 teaspoon salt and cook over medium heat 5 minutes.
  2. Add the potatoes, oregano, marjoram, the rest of the salt, pepper, and broth.  Bring to a boil and then reduce to a simmer. Allow to simmer about 15 minutes.
  3. Add the quinoa and allow to simmer another 15-20 minutes.
  4. Optional: Take 2-3 cups of the stew and transfer it to a blender.  Blend and then return the blended mixture back to the pot.
  5. Add the chopped greens and lemon juice and cook until the the greens are wilted, about 5 more minutes.  Taste and add more salt and pepper, if desired.  Enjoy!

Nutrition

  • Serving Size: 1/6 of recipe
  • Calories: 264
  • Sugar: 9.7 grams
  • Fat: 8 grams
  • Carbohydrates: 39.2 grams
  • Protein: 9.7 grams


If you make this Quinoa Vegetable Stew recipe, I would LOVE to see it! Please take a pic and share it on Instagram or Facebook and tag me @happyhealthymama ðŸ™‚

Also, if you try it, would you mind rating the recipe? It’s VERY helpful for me and other readers if the recipes have ratings and reviews. I appreciate you!

If you’d like to save this recipe for later, here’s an image to save to your Pinterest recipe board.

quinoa vegetable stew recipe #vegan #glutenfree #healthy #weeknightdinner

The post Quinoa Vegetable Stew Recipe appeared first on Happy Healthy Mama.


source https://happyhealthymama.com/quinoa-vegetable-stew.html